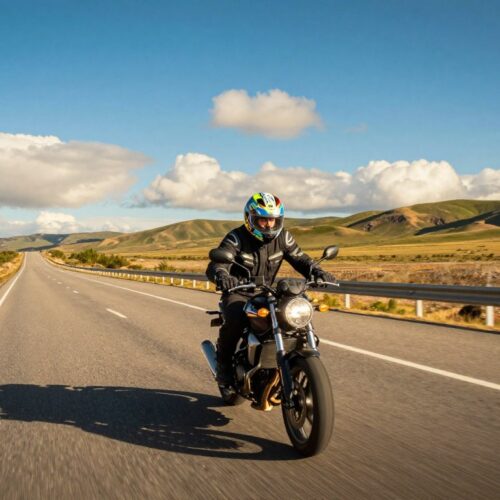
Learn how to use non-verbal communication and motorcycle etiquette for a smooth group ride. This article covers motorcycle riding in groups across the United States. It shows how clear signals and shared rules help a pack move as one.
Riding in a pack has many benefits. It improves safety, coordination, and camaraderie. Simple tools like staggered formation, hand signals, and a pre-ride briefing reduce risks and keep everyone together.
You’ll learn about the staggered formation and common non-verbal communication gestures. The article also talks about the roles of lead and sweep riders. Respect and active listening are key to motorcycle etiquette, making rides predictable and fun for all.
Find resources like the Motorcycle Safety Foundation for group riding rules and ReiseMoto for long-distance planning and gear. The full article includes visual aids like formation diagrams, hand-signal infographics, and a pre-ride checklist. These will help you practice and remember these ideas.
Importance of Communication in Group Riding
Clear communication is key to safe and fun rides. Using consistent signals and agreed-upon routines helps avoid accidents. It also prevents sudden lane changes that might surprise others.
Experienced riders often have pre-ride briefings. Groups like Harley-Davidson Riders Group or local BMW clubs plan the route and stops. They also discuss emergency plans and contacts. This way, everyone knows what to do if someone gets lost.
Hand signals are the main way to communicate in group rides. They tell others about turns, hazards, and changes in speed. Phones and intercoms are for urgent calls or after-ride chats.
Your body language is important too. Showing calm and confidence through your posture and gestures helps the group. Studies show that clear gestures keep everyone’s spirits high and anxiety low.
Respect is crucial for good communication. Listening actively and being inclusive helps everyone feel valued. When riders respect each other, they trust and follow signals without doubt.
| Communication Element | Primary Use | Tools |
|---|---|---|
| Pre-ride Briefing | Share route, stops, and emergency plans | Maps, printed route sheets, group messaging |
| Hand Signals | Indicate turns, hazards, speed and lane changes | Standard group signals, visible arm gestures |
| Nonverbal Cues | Convey confidence and calm to the pack | Posture, eye contact, helmet nods |
| Electronic Communication | Urgent alerts and after-ride coordination | Sena, Cardo, cell phones |
| Social Practices | Build trust and reduce friction | Active listening, inclusive briefings, respect |
Preparing for a Group Ride
Before you hit the road, do a quick check on your bike. Look at brakes, tire pressure, lights, oil, and coolant. Make sure panniers and luggage are secure to avoid any issues at high speeds. This is key for safe riding and avoids unnecessary stops.
Make a simple packing list. Don’t forget a charged phone, emergency contacts, a first aid kit, and a basic toolkit. Also, bring spare fuses and tire repair items. ReiseMoto and the Motorcycle Safety Foundation have great tips and gear suggestions for long trips.
Get your pre-ride details sorted with the group. Confirm the route, stops, and what to do if someone gets lost. Decide who will carry emergency numbers. This ensures everyone knows where to meet and avoids confusion.
Assign roles and set expectations. Choose a lead rider and a sweep rider for direction and backup. Remind everyone to respect personal space and not touch other bikes without permission. This is crucial for group safety.
Discuss safety rules before you start. Always ride sober and follow traffic laws. Adjust your formation based on road conditions and traffic. Use agreed-upon hand signals for turns, hazards, and lane changes.
Use visual aids to help everyone remember the plan. A printed checklist or photos of important gear can be very helpful. Clear communication and visuals reduce errors and make the ride better for everyone.
| Category | Must-Have Items | Group Role |
|---|---|---|
| Mechanical | Brakes, tires, lights, fluids, secure panniers | Lead confirms route; sweep checks stragglers |
| Personal | Charged phone, emergency contacts, first aid kit, toolkit, spare fuses, tire repair | Each rider carries personal kit; one rider stores group emergency numbers |
| Logistics | Route map, planned stops, contingency plan for separation | Lead files route; sweep monitors pace and signals |
| Etiquette & Safety | Agreed hand signals, obey laws, no touching other bikes | All riders follow rules; ride captain enforces standards |
Non-Verbal Communication Techniques
Clear hand signals are key to keeping a group safe and in sync. Learn the standard gestures before hitting the road. For a comfort stop, hold your left arm out wide, fist clenched, and move it up and down.
To follow someone, hold your arm straight up with your palm facing forward and wave. If you’re leading, extend your left arm and swing it to signal the pace.
Pointing at a hazard in the road helps alert others without yelling. To speed up, hold your palm outward, facing up, and move it up. Practice each gesture until it’s clear and easy to see from a distance.
Body language is just as important as hand signals. Use head nods and brief eye contact to confirm understanding when it’s safe. Subtle posture shifts and lean cues can signal your intent to change speed or line.
Avoid big facial expressions that might confuse others. Small eye movements and relaxed expressions show confidence. Keep your movements deliberate to ensure clear communication while riding in groups.
Make a one-page infographic of group signals and share it before the ride. Visual aids help everyone remember and recognize signals faster. Review the sheet during the pre-ride briefing.
Use single-file gestures in tight spots or narrow lanes. For open roads, use wider, more visible motions. Adjust your signals based on the road and weather to avoid confusion.
Respecting cues builds trust in the group. Keep lines predictable, avoid crowding, and never make aggressive gestures. Clear signals and consistent non-verbal cues help ensure smooth group riding.
| Gesture | How to Do It | When to Use |
|---|---|---|
| Comfort stop | Left arm out wide, fist clenched, move up and down | When a rest or fuel stop is needed |
| Follow me | Arm straight up, palm forward, wave | Lead asks group to follow current route |
| You lead | Left arm extended and swinging | Signal another rider to set pace or take lead |
| Hazard | Point toward the hazard in the roadway | Debris, pothole, or obstacle ahead |
| Speed up | Palm outward, facing up, move up and down | Ask the group to increase pace safely |
Group Riding Etiquette

Motorcycle etiquette is more than just following traffic rules. It’s about respecting each other’s space and bikes. Never touch someone else’s bike without permission. Being open to all types of bikes, from Harley-Davidson to Honda and Yamaha, helps keep everyone safe.
Be on time for the pre-ride briefing and stick to your assigned spot. This keeps the group together and avoids surprises. If someone asks you to move or hold a spot, do it quickly and calmly.
Use clear signals and simple gestures when riding together. Say you’re changing lanes early and point out dangers smoothly. A nod or hand signal shows you heard the call, building trust and safety.
Keep a steady distance from the rider in front of you. On tight roads, ride single-file to give everyone room. Avoid riding side-by-side as it limits escape routes.
Be respectful during briefings and listen well. If you make a mistake, own up to it and apologize. This shows respect and keeps riders coming back.
Don’t judge others based on their bike or skills. Help newcomers by sharing tips and being patient. Teach group signals gently, not harshly. Your positive attitude makes group rides better for everyone.
Pre-Ride Briefing Essentials
Begin with a clear route overview. Show waypoints, fuel stops, and comfort breaks. Also, highlight challenging sections and alternate routes for traffic or construction.
Define roles for everyone to know who leads and who sweeps. The lead sets the pace and follows the route. The sweep stays at the rear to help with breakdowns and keep riders together.
Review fuel and comfort stops, and have a plan for emergencies. Share emergency contacts and basic medical info for each rider. Make sure a phone or intercom plan is in place.
Run through hand signals for hazards, speed changes, lane shifts, and stopping. Practice a few signals so they become second nature. A brief signal review reduces confusion on the road.
Cover expected pace and formation choices, including staggered versus single-file. Use a quick-reference diagram to show where each rider should sit in formation and when to change it.
Set communication protocols for helmet intercoms, phones, and voice calls. Explain regroup procedures if a small group splits off and who will make call decisions in unexpected situations.
Touch on logistics and etiquette: luggage checks, personal maintenance, no touching other riders’ bikes, and obeying local traffic laws. Remind riders to carry ID, insurance, and any needed medical info.
Encourage visual aids such as printed route maps, signal cards, and a one-page diagram of formations. These items help reinforce group riding communication and make the pre-ride briefing efficient for everyone.
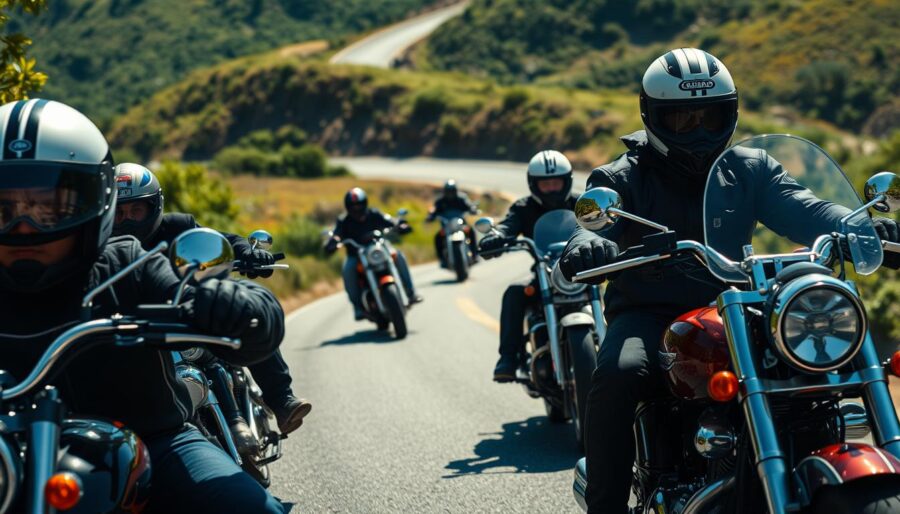
Riding Position and Formation
When riding in a pack, use a staggered formation. The lead rider takes the left third of the lane. The second rider stays in the right third. Keep repeating this pattern down the line.
This way, each rider has clear sight lines and escape routes. It’s important for safety.
Keep a gap of about 1–2 seconds between staggered riders. This gap gives you time to react if the rider ahead slows or a hazard appears. Adjust gaps for speed, road surface, and the skill level of your group.
Switch to single-file on tight curves, poor pavement, or heavy traffic. Single-file improves maneuvering and lowers the chance of collisions when space is limited. Practice changing formation smoothly during low-traffic rides.
Avoid side-by-side riding except when stopping or signaling. Riding abreast cuts your maneuver room and raises the risk when braking or dodging obstacles. Stay disciplined so the whole pack moves predictably.
Visual learning helps. Use diagrams that show lane thirds and correct positioning, then rehearse those positions in a quiet parking lot before long tours. Group riding communication and clear group signals during practice will shorten the learning curve.
Table of common formation choices and when to use them:
| Formation | Positioning | When to Use | Benefit |
|---|---|---|---|
| Staggered formation | Lead left third, second right third, alternate | Open roads, clear lanes | Better visibility and escape paths |
| Single-file | One rider centered in lane | Tight curves, narrow lanes, heavy traffic | Improved maneuvering and reduced collision risk |
| Side-by-side | Riders level across lane | Stopping areas or brief maneuvers only | Short-term social or signaling convenience |
| Loose file | Variable spacing within lane thirds | Mixed skill groups, varying speeds | Flexible spacing to match rider ability |
For deeper rules and tips on motorcycle etiquette and group riding communication, review this guide at motorcycle group riding rules. Practicing these formations will make your motorcycle riding in groups communication clearer and your time riding in a pack safer.
Responding to Hazards and Obstacles
When you see debris, a pothole, or sudden traffic, act quickly and stay calm. Use the hazard-in-roadway signal by pointing or indicating direction. This lets riders behind you know about the threat. Also, tap your brakes gently to warn following riders when you’re close together.
Slow down in a controlled way and send a follow-on signal for reduced speed. Clear communication keeps everyone in sync. If you’re riding single-file, use subtle head turns or pointing to show the line to avoid.
On poor pavement or when the road narrows, ride closer together and shift to single-file. The lead rider should scan far ahead and signal hazards early. Early signals help the group change formation smoothly without surprises.
The sweep rider keeps an eye on the rear for problems. They help downed riders and note hazards to report at the next regroup stop. Good sweeps strengthen motorcycle riding in groups communication and reduce risk.
Practice hand signals and hazard signals during rehearsal rides so responses are automatic. Use intercom alerts when available, but never depend only on electronics while moving. Redundant non-verbal cues make your group safer.
Distribute a short hazard-response checklist in pre-ride briefings. Rehearse calls, hand signals, and actions you expect from each position. Consistent practice builds muscle memory and improves group riding communication.
| Situation | Immediate Action | Signal Type |
|---|---|---|
| Debris in lane | Point toward debris, slow smoothly, move single-file if needed | hand signals, hazard signals |
| Pothole or rough surface | Scan ahead, indicate direction, compress spacing | hand signals, tapping brakes |
| Downed rider | Sweep stops to assist, lead secures scene, group regroups | radio or intercom plus visual signals |
| Sudden traffic slowdown | Controlled deceleration, follow-on reduced speed signal | hazard signals, tapping brakes |
The Role of Leadership in Group Rides

Clear leadership is key when riding with others. The lead rider sets a safe pace and navigates the route. They also scan for hazards and signal changes in formation.
Strong lead rider habits help the group move smoothly. This reduces surprises on the road.
The sweep rider keeps an eye on the rear. They make sure no one is left behind and help with mechanical issues. They also carry spare tools or first-aid gear.
At regroup stops, the sweep rider shares any problems with the lead rider. This helps adjust plans as needed.
Good leadership combines skill and soft skills. It’s important to show calm body language and listen actively during briefings. Treat feedback with respect and humility.
Respectful behavior keeps trust and authority without tension. It’s crucial for a smooth ride.
Before you start, agree on decision protocols. Announce any changes from the plan during the pre-ride talk. Use agreed hand and light signals for changes on the road.
Encourage riders to speak up. You want timely input, not silence.
Rotate roles to build depth in the group. Let less-experienced riders try lead and sweep duties during short runs. Practice drills for navigation, regrouping, and roadside fixes.
This way, everyone gains confidence in leadership responsibilities. When you combine defined duties with respectful communication, your group riding improves. This leads to safer, more enjoyable rides for all.
Dealing with Different Skill Levels
Before you start, sort riders by their experience. Put the most confident ones in the middle or back if needed. Newer riders should be near the front to watch the lead rider’s signals and lines.
Choose a pace that’s safe for everyone, especially the slowest rider. Don’t push anyone to go too fast. Talking about the pace helps everyone stay together smoothly.
Teach new riders about spacing, following lines, and using hand signals. Let the more experienced riders show how it’s done. Be patient and give feedback that helps them improve.
Make sure everyone feels welcome, no matter their bike or speed. Keep the instructions simple and clear. Start with slow rides to help new riders feel more confident.
Encourage riders to own up to their mistakes. Practice fixing mistakes in safe places like parking lots. This helps everyone learn and ride better together.
| Skill Level | Recommended Position | Role | Training Focus |
|---|---|---|---|
| Beginner | Near lead | Observe and follow | Basic signaling, spacing, slow-speed control |
| Intermediate | Middle | Steady pace keeper | Cornering consistency, safe overtakes, mirror checks |
| Advanced | Middle or rear | Mentor and sweep support | Advanced lines, hazard management, leadership cues |
| Sweep Rider | Last | Accountability | Recovery protocol, rider checks, communication relay |
Importance of Practice and Rehearsal
Plan structured, low-traffic rides to improve group communication. Start with short loops for practicing staggered formation and single-file transitions. This helps without feeling rushed.
Focus on key skills with practice drills. Do signal recognition, lead and sweep rotations, controlled braking, and hazard response drills. These drills help your team remember hand signals and how to change formation.
Use visual aids like signal cards and formation diagrams. They help learn faster and avoid confusion. After each drill, take a moment to review and correct any mistakes.
Keep practicing until hand signals and formation changes feel automatic. This repetition builds trust and quickens reactions. It also reduces the risk of miscommunication during busy rides.
Don’t forget to add emotional and social elements to your practice. Group activities boost friendship, listening skills, and respect. These benefits make riding together more effective and enjoyable.
| Drill | Objective | Duration | Key Focus |
|---|---|---|---|
| Signal Recognition Runs | Speed up identification of hand signals | 15 minutes per rotation | hand signals, visual confirmation |
| Alternating Lead/Sweep Rotations | Practice leadership and support roles | 30 minutes total | positioning, role awareness |
| Controlled Braking Exercises | Improve stopping coordination in formation | 20 minutes | spacing, braking timing |
| Simulated Hazard Response | Train split-second group reactions | 25 minutes with multiple scenarios | hazard signaling, emergency stops |
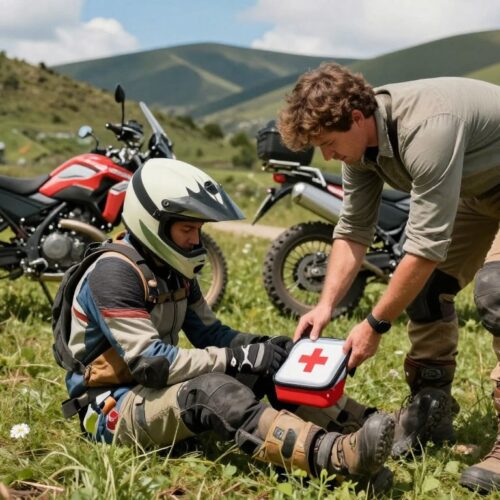
Handling Emergencies in a Group
First, make sure the scene is safe. Move bikes off the road and turn on hazard lights. Use clear hand signals to slow down and stop.
Quickly assign roles. One rider becomes the first responder, another calls 911, and a sweep stays with the injured rider.
Always carry a basic first-aid kit and know the local EMS numbers. Your plan should say who calls 911 and who gets medical details. Use intercom systems like Sena or Cardo for quick updates.
If a bike breaks down, the sweep or a support rider tries to fix it. Move any separated riders to the planned meeting spot. Use hand signals to ask for help and show where to repair.
Review emergency plans before you ride. Make sure everyone knows who to call and how to share information. Keep phones charged and use communication tools only for important updates.
After an emergency, have a calm debrief. Talk about what happened and who did what. Discuss any issues with the plan and welcome feedback. Encourage everyone to own up to mistakes and agree on updates to your plan.
After the Ride Communication

Make the after-ride debrief a regular part of your group rides. A quick meeting helps you talk about the route, signal use, and how well you stayed together. Also, note any close calls or mechanical problems for a safer next ride.
Use good feedback practices during the debrief. Listen well, don’t point fingers, and praise good actions. When leaders show emotional smarts and humility, communication in group rides gets better fast.
Don’t forget to follow up with practical steps. Update your route notes, check emergency contacts, and fix or replace any broken gear. Share photos or notes to help everyone remember important moments.
Keep a simple checklist and incident log to track safety improvements. This helps plan better for future rides and makes communication measurable.
Use the debrief to build friendships too. Say thanks, plan the next ride, and have a “compliment corner” to share positive vibes. For tips on two-up travel and coordinating riders, see this resource.
Ending on a practical note makes the debrief a learning and bonding experience. Regular debriefs improve safety and enjoyment in group rides.
Building Camaraderie Among Riders
Start rides with a quick round of introductions to make newcomers feel welcome. Explain basic motorcycle etiquette and how you communicate in groups.
Set up simple social rituals. A five-minute meet-and-greet, a group photo, or a shared coffee stop creates memories and trust. These small actions make riding in a pack feel personal.
Create clear channels for feedback. Use a group chat or post-ride thread to praise helpful actions and report safety issues. This keeps motorcycle etiquette in mind. Encourage quieter riders to share, improving the group’s tone.
Encourage mentoring between experienced riders and novices. Pairing a veteran with a newer rider builds skill and respect. Mentoring improves communication and reduces risky behavior.
Practice off-bike connection. Mirroring body language, making eye contact during stops, and offering sincere compliments deepen emotional bonds. These habits boost mutual care when riding in a pack.
Plan occasional social events beyond the road. Group meals, charity rides, and photo-sharing sessions strengthen ties. Events give riders reasons to follow motorcycle etiquette naturally.
Foster an inclusive culture that rejects cliques and elitism about brands or skill. Set norms that value active listening, intellectual humility, and empathy. Strong culture keeps group riding communication healthy over time.
Keep recognition visible. A compliment corner in your chat or a short praise segment at the end of each ride highlights contributions. Celebrating milestones builds loyalty and makes riding in a pack more rewarding for everyone.
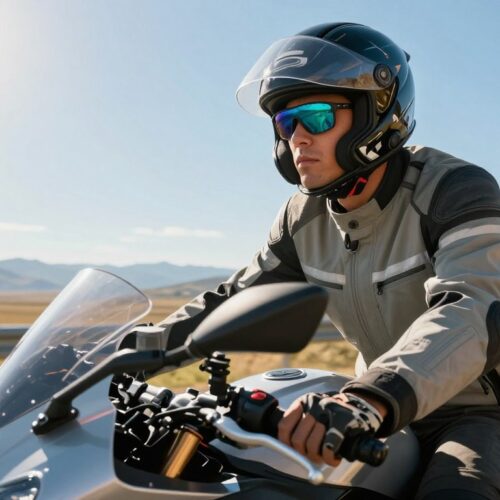
Using Technology for Group Riding
Choose tech that helps with clear communication in groups. Use helmet intercoms from Sena and Cardo for sharing important info. They’re great for quick updates when stopped or on long straights.
Before you start, share route files with Google Maps, Waze, or Rever. Send emergency contacts and plans through group messaging. Make sure everyone has the same info. Charge batteries and pair devices; test audio and volume in a quiet spot.
Keep using hand signals even with tech. Hand signals are key when you’re moving. Discuss when to use helmet intercoms and when to be quiet before you ride.
Be ready for tech failures. Carry printed maps and a contact list. Practice simple regroup procedures so everyone knows what to do if someone gets lost.
Respect everyone’s privacy and comfort level. Not everyone wants to be connected all the time. Offer low-tech options and make sure everyone is comfortable with the tech used.
Here is a compact comparison to help you decide which tools to prioritize during a ride.
| Tool | Best Use | Strengths | Limitations |
|---|---|---|---|
| Helmet intercoms (Sena, Cardo) | Short voice calls, group alerts | Hands-free clarity, built for helmets | Battery life, range limits, potential distraction |
| GPS & route apps (Google Maps, Waze, Rever) | Route sharing, live reroutes | Accurate mapping, real-time traffic | Requires data, can drain phone battery |
| Group messaging platforms | Pre-ride planning, updates | Easy file sharing, wide adoption | Not useful while riding; need pauses to read |
| Printed maps & written contacts | Backup navigation and emergency info | Failsafe, no battery required | Bulkier, less precise than digital routes |
Balance tech with basic skills for safe riding in a pack. Use devices to enhance group communication, not replace basic signals or rider awareness.
Lifelong Learning in Group Riding
Staying safe and riding smoothly gets better with learning. Plan regular drills and workshops. These focus on signaling, formation, and emergency stops. They keep your group’s communication sharp and lower the risk of mistakes.
Change who leads the ride often. This lets everyone learn about route planning and speed control. Leading hands-on helps you understand MSF rules better. It makes the group more predictable and calm.
Have reviews after each ride. This builds a culture of feedback. Share constructive comments and note any close calls. Keeping track of these helps improve your riding skills and teach new members.
Encourage riders to take formal training. Courses from the MSF and other advanced riding programs improve cornering and braking. You’ll see safer riding when these skills are used on the road.
Use trusted resources for planning and advice. Guides from the MSF and other experts help with route choices and packing. Well-planned rides reduce stress and improve communication.
Encourage curiosity and open-mindedness. Ask questions and listen to different opinions. This helps the group work together better and stay focused on safety.
The table below lists ways to keep your group learning and improving. Each practice helps make your rides safer and your teamwork stronger.
| Practice | Action Steps | Expected Benefit |
|---|---|---|
| Refresher Drills | Monthly short drills on signaling and emergency stops | Quicker, unified responses to hazards |
| Leadership Rotation | Rotate lead and sweep positions each ride | Broader experience and steadier decision-making |
| Formal Training | Attend MSF courses and advanced clinics | Improved riding technique and hazard perception |
| After-Ride Reviews | Collect feedback and log near-misses | Data-driven improvements to procedures |
| Resource Use | Consult MSF guides and trusted touring sources | Better planning, gear choices, and route strategy |
| Cultural Practices | Promote empathy and open dialogue | Smoother group dynamics and higher retention |
Final Thoughts on Group Riding Communication
Clear communication is key when riding in groups. Use simple hand signals and consistent signals. Also, have a quick briefing before you start to discuss formations and roles.
Keep the right formation and practice often. Drills help everyone stay alert and ready for surprises. A good leader listens and leads with respect, keeping the group safe and united.
Use hand signals, tech, and clear roles for emergencies. Make sure your bike and gear are ready. Attend briefings, practice drills, and carry emergency contacts. With practice, your rides will be safer and more enjoyable.