Quick gains you can feel: rinsing or treating deposits brings smoother idle, faster starts, and firmer throttle response. You’ll also see fewer hesitation events under load, though this is not a fix for electrical or mechanical faults.
This short guide shows two practical approaches: a tank‑treatment for mild to moderate buildup and a deeper injector removal and bench clean for stubborn clogs. You’ll learn when to use each method, including after long storage or when symptoms appear.
The advice targets riders in the United States who keep EFI or carbureted bikes. Compatibility notes cover pump gas versus race blends and two‑stroke pre‑mix vs injection, since product choice and dosing differ by setup.
Safety first: you’ll get steps to protect sensors, handle liquids safely, and know when a pro is the smarter option. The goal is better performance and efficiency today—not tank restoration or major pump repair.
Why a Clean Fuel System Improves Motorcycle Performance and Fuel Economy
Small deposits cause big problems; getting them out restores predictable power and response. Deposits in tiny passages or on injector tips change how spray patterns form and how jets meter, which makes your throttle response feel delayed or jerky.

Hesitation and stalling often come from partial clogs that force lean-rich swings during throttle transitions. That instability hits hardest at light throttle and idle. A targeted cleaner can stabilize mixture control and reduce stalls.
Better throttle response, less hesitation, and fewer stalls
When delivery is consistent, the ECU or carb circuits can meter correctly. EFI uses ECU corrections while carburetors rely on vacuum and calibrated jets, but both benefit when passages are clear.
Cleaner combustion for restored power and efficiency
Improved atomization means fuller combustion and recovered power without other engine changes. Quality, high-temp detergents act under operating heat to strip intake and chamber deposits as you ride, which directly helps fuel economy.
- Deposits restrict flow and alter spray or jet sizing.
- Partial clogs cause lean/rich swings and hesitation.
- Cleaner combustion improves burn efficiency and mileage.
Signs Your Fuel Injectors or Carburetor Circuits Are Clogged
A few obvious riding cues usually point to restricted injectors or blocked carb circuits before you touch a wrench. Watch starts, idle, and how the bike pulls—those tell you where to look.

Hard starts, rough idle, and inconsistent throttle response
On the driveway you may see longer crank time and hard starts after it sits overnight. A rough or “hunting” idle that never settles is another clear sign.
Inconsistent throttle response often shows as a flat spot, a bog, or a delayed pull when you roll on from low RPM.
Slower acceleration and reduced high‑speed performance
Under load the bike can feel held back: slower acceleration, poor high-speed performance, and generally low power output despite high revs.
Excess vibrations, odd noises, or smoke
Secondary cues include excess vibrations, unusual intake or exhaust noises, and smoke from the tailpipe. These can also come from ignition faults, air leaks, or wear, so don’t assume injectors are the only cause.
- Compare cold start behavior and steady cruising to spot improvement after treatment.
- Check roll-on response at the same RPM and gear for repeatable bogging.
- Ask yourself: when did symptoms start, did the bike sit, did fuel quality change, and do issues worsen with heat?
- Expect cleaning to help if deposits restrict flow; it won’t fix electrically failed injectors or a weak pump.
- Use these observations to decide whether a simple tank additive or a bench injector job is next.
Know Your Setup: Fuel Injection vs. Carburetor Fuel Delivery
Knowing whether your engine uses a carburetor or fuel injection shapes every maintenance step you take. This helps you pick the right methods and avoid wasted work.
How they differ in delivery and operation
Carburetor meters fuel through jets and passages that mix fuel with air mechanically. Small pilot jets handle idle and low throttle, while larger jets open at higher throttle.
Fuel injection meters fuel electronically through injectors that spray measured amounts directly into the intake. Injection gives better throttle response and often better economy across temperatures and altitude.
Maintenance differences and the ways you’ll treat them
- EFI needs clean fuel, sound filters, and occasional injector attention; tiny orifices are sensitive to varnish.
- Carburetor work focuses on circuit passages, float and needle inspection, and synchronization for smooth idle.
- This guide uses in‑tank detergents for both, bench/pulsed injector methods for EFI, and run‑then‑soak tactics for jets and passages.
Note: emission‑controlled vehicles may have O2 sensors and catalytic converters, so choose products that won’t harm those parts. The rest of this article branches by your setup so you can follow the correct steps for your engines and delivery type.
Types of Motorcycle Fuel Injection Systems and What They Mean for Cleaning
Different injection layouts change where deposits form and how you should approach maintenance. Each type alters symptoms and the best service path, so identify your setup before you buy products or start work.
Single‑Port / Throttle‑Body Injection
Single Port Injection (often throttle‑body) uses one injector upstream of multiple cylinders. One clogged injector affects all cylinders, so you focus on the throttle‑body and upstream contamination in the tank and lines.
Multi‑Point and Sequential Injection
Multi‑Point Fuel Injection gives each cylinder its own injector. A single clogged nozzle can feel like a misfire or uneven idle on one cylinder.
Sequential Fuel Injection times each injector with the ECU for precise metering. That timing makes consistent spray pattern and flow more important for smooth running and economy.
Why Direct Injection Is Rare on Bikes
Direct injection is common in some cars and diesel vehicles but needs high‑pressure pumps and special injectors. That hardware and higher carbon buildup risk make it uncommon on most bikes.
- Type guides the work: mild deposits often respond to an in‑tank treatment; persistent one‑cylinder issues point to targeted injector service.
- Deposits usually start at the tank—condensation, old gas, or residue—so filtration and storage matter.
- Match product selection to your emissions gear and fuel type to avoid sensor or catalytic damage.
Safety and Prep Before You Start Cleaning
Before you touch any lines or parts, set up a safe, well‑ventilated work area and plan each step. Take a few minutes now to reduce risk and save time later.
Handling fuel and protecting components
Work outdoors or in open air so vapors disperse. Position a fire‑safe surface and keep flames, sparks, and phones away.
- Use approved containers when draining gas and label them.
- Cover painted surfaces and plastics to avoid spills and staining.
- Choose products marked safe for O2 sensors and catalytic converters to avoid damage.
When to stop and call a pro
Disconnect the battery before opening lines and follow the manual to relieve pressure on EFI rails. If you find recurring no‑start, unexplained leaks, bad pump pressure, damaged connectors, or cracked lines, stop.
Final pre‑check: confirm you have fresh fuel on hand, verify the tank condition, and check warranty or emissions rules for your vehicle before proceeding.
Tools and Supplies You’ll Use to Clean the Fuel System
Before you start, assemble tested products and the handheld gear that let you work safely and efficiently. A short kit saves time and prevents mistakes when you service injectors or jets.
In-tank injector cleaner options
For an in-tank approach, pick a reputable fuel injector cleaner and enough fresh gasoline to dilute old gas. That lets the detergent circulate under normal running conditions.
Common US choices include Chevron Techron Concentrate Plus, Royal Purple Max Atomizer, Amsoil Performance Improver, PJ1 Fuel Injector & Carb Cleaner, Gumout Fuel Injector Cleaner, and Red Line Complete SI-1. Compare concentration, treated volume, and emissions compatibility before you buy.
Bench-cleaning kit basics
For deeper service, use a fuel injector cleaning kit such as the Motion Pro toolkit. You’ll need a 9V battery to pulse the solenoid, electrical connectors, clamps/adapters, cleaner solvent, and basic hand tools for removal.
- Why pulsing matters: energizing the injector opens the pintle so solvent flows through internal passages, not just over the outside.
- Supplies checklist: new O-rings, shop towels, eye protection, nitrile gloves, and a torque reference to avoid overtightening.
- Follow best practices for using fuel ratios, run cycles, and soak times to avoid lean running or knock during treatment.
Choosing the right injector cleaner or fuel injector cleaner comes down to concentration and compatibility. Keep the chosen product labels handy and match treatment volume to your tank size so you get repeatable results.
How to clean motorcycle fuel system with an In-Tank Fuel System Cleaner
An in‑tank treatment is the quickest way to tackle light deposits without removing parts.
When an in‑tank bottle works best
Use this method for: mild to moderate hesitation, bikes that sat a few months, or as preventive maintenance.
It helps when symptoms are subtle and affect multiple cylinders rather than a single dead injector.
How to dose and run the cleaner
- Read the product label to match treated fuel volume.
- Pour the bottle into the tank first so it mixes evenly.
- Add fresh gas, then ride until the engine reaches full operating temperature.
What the treatment targets
The detergent works under heat and load to loosen residue in the tank and gas tank seams, suspend varnish in fuel lines, and clean injector inlet screens.
It also helps port injectors, intake valves, and combustion chambers where deposits raise octane demand.
Compatibility and aftercare
- Confirm label guidance for pump vs. race gas and two‑stroke pre‑mix or oil‑injected setups.
- Some bottles are safe for converters and oxygen sensors; check the product specifics.
- Liquefied tank residue can clog a serviceable filter—monitor flow and replace the filter if needed.
Judge progress over a full tank: smoother idle, fewer roll‑on stumbles, and cleaner midrange pulls. If issues persist, move to a deeper bench or injector service.
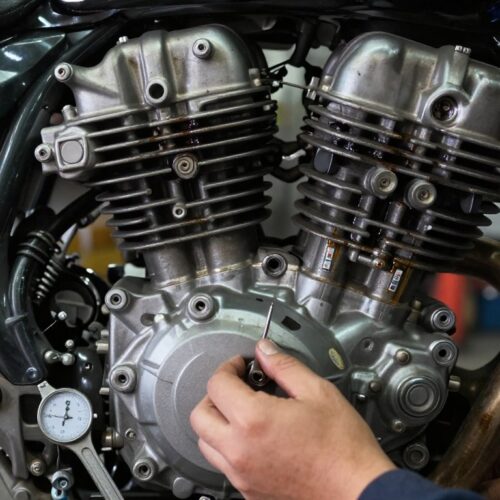
Deep Cleaning by Removing and Cleaning Fuel Injectors
Accessing each injector directly gives you control to flush, pulse, and verify true flow and spray. Follow the service manual for your bike to avoid surprises and protect fragile fittings.
Access and safe disassembly
Remove seat and bodywork, then lift the tank and pull the air box to expose throttle bodies or the rail. Label hoses and electrical plugs so reassembly is easy.
Tip: relieve rail pressure and disconnect the battery before opening lines to prevent spills and sparks.
Removing rails and injectors
Loosen rail fasteners evenly and wiggle the rail free. Extract injectors straight out; never pry them. Replace O-rings if they show wear.
Pulsed bench cleaning and bi-directional flushing
Use a pulsing kit (Motion Pro style) and a 9V to energize the pintle while you spray solvent through. Repeat from the opposite side to dislodge trapped varnish and debris.
Reinstall checks and validation
- Lightly lube seals, seat injectors fully, and torque fasteners to spec.
- Prime the system, check for leaks, then run the engine and watch pressure and idle.
If delivery improves, you should feel steadier idle and recovered power. If not, test fuel pressure or ignition next.
Cleaning a Motorcycle Fuel System After It Sits: Old Gas, Gum, and Varnish
When a bike sits for months or years, the remaining gasoline changes from a volatile mix into sticky varnish that clings to the tank and passageways. Even with stabilizer, the light vapors evaporate first and what’s left gets heavier and syrupy.
Spot the varnish: smell a sharp, varnish-like odor, see amber staining, or find sticky residue on tank walls. When you move the bike, suspended crud often floats up from the bottom.
Practical drain-and-refresh method:
- Remove as much old gas as possible into an approved container.
- Add one can of Sea Foam to what remains, then pour in about 1 gallon of fresh gas.
- Run the engine ~8 minutes, then shut it off and let the mixture soak overnight (2–3 days for heavy varnish).
After soaking, add another gallon of fresh gas, run 5–8 minutes to warm the engine, then take a short ride to expose the passages to heat and compression. Sea Foam and similar cleaner formulations can liquefy varnish and suspend debris.
- Expect loosened residue to travel toward filters or injectors—monitor for new restrictions.
- The same run‑then‑soak approach works for carburetor circuits and EFI; escalate to disassembly if symptoms persist.
Choosing the Right Fuel Injector Cleaner or System Cleaner for Your Motorcycle
Your choice of product should start with the symptom, tank size, and emission gear on your bike. That helps you pick a bottle that actually addresses storage varnish, mild drivability issues, or heavy nozzle deposits.
Popular injector cleaner products riders use
Riders commonly choose Chevron Techron Concentrate Plus, Royal Purple Max Atomizer, Amsoil Performance Improver, PJ1 Fuel Injector & Carb Cleaner, Gumout Fuel Injector Cleaner, and Red Line Complete SI-1.
These names vary by concentration and target volume. Match the product description to your tank size so one bottle treats the full tank as directed.
What high-temp detergents and upper-cylinder lubrication mean
High-temp detergents are formulated to work under operating heat to break down deposits on injectors, intake ports, and combustion chambers while you ride.
Upper-cylinder lubrication claims mean added lubricity for intake components. That can help older bikes, but it does not replace engine oil or fix worn parts.
Emissions and sensor considerations
Choose products labeled safe for catalytic converters and O2 sensors. Avoid harsh solvents that can damage sensor coatings or catalyst substrates.
Value and dosing: concentration, treated volume, and cost per treatment
- Compare bottle price to the treated gallons listed on the label.
- Divide cost by number of treatments to find true value per use.
- Follow the manufacturer description for dose; overdosing wastes money and can cause drivability issues, while underdosing often fails to resolve symptoms.
Bottom line: pick a product that fits your symptoms, respects emissions gear, and gives clear dose guidance. Regular, correctly dosed treatments and fresh fuel habits deliver better long‑term economy and throttle response than occasional shock cures.
Maintenance Timing and Post-Clean Verification
Think in mileage blocks and storage cycles when you plan injector upkeep. That makes maintenance practical and tied to how you actually ride.
How often to service injectors
Routine: use an additive every 2,500–3,000 miles as light maintenance if you ride frequently.
Deep check: consider a full inspection or bench service about every three years or ~45,000 miles, or sooner if symptoms return.
Increase frequency for short trips, poor-quality fuel, or seasonal storage. Reduce it if you ride daily and keep fresh gas.
Test-ride checklist to verify results
- Cold start quality and crank time.
- Idle stability at a stop and no hunting.
- Roll-on response in one gear at a fixed RPM.
- Acceleration through the midrange and steady power output.
Prevent repeat clogs and when to escalate
Top off with fresh gas before storage, use stabilizer correctly, and keep the tank sealed to limit moisture. Run the engine long enough to circulate treated fuel.
If problems persist, test fuel pressure, inspect the filter and pump, check for intake leaks, and confirm ignition health. For EFI bikes, confirm there are no check-engine lights and re-check injector seals after heat cycles.
Conclusion
Key takeaway: a tidy fuel system supports consistent delivery, smoother combustion, and more predictable riding—especially after storage or when symptoms point to restriction.
Start simple: try an in-tank treatment for mild hesitation. If drivability or single-cylinder issues persist, move to injector removal and a pulsed bench service for targeted restoration.
Work safely: handle gas carefully, protect sensors and emissions components, and verify results with a structured test ride rather than guessing.
Pair treatments with good habits—fresh fuel before storage and regular maintenance—to reduce varnish and recurrence.
Next step: match the method to your motorcycle and symptoms, follow product dosing, and seek professional help if you find leaks, pressure faults, or unresolved engine problems.