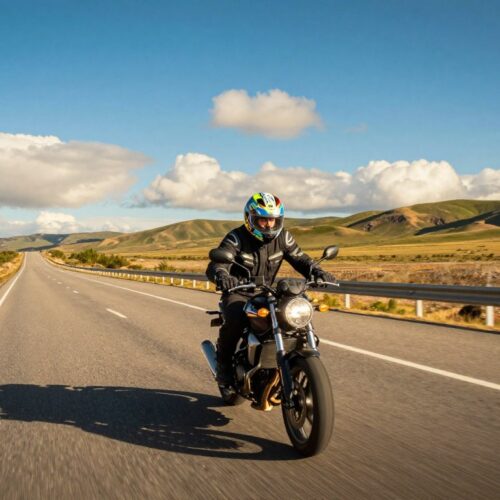
You ride remote roads and take risks that car drivers rarely see. Motorcyclists face much higher danger: crashes are about 34 times more likely to be fatal than for car occupants. That reality makes basic emergency care vital on every trip.
This short guide sets clear expectations. You will learn what to do in the minutes after a crash, before paramedics arrive. The focus is practical and specific to riders, covering kit setup, scene safety, calling 911, quick ABC checks, and treating common wounds without making things worse.
These methods differ from general courses because you face greater exposure, heavy gear, and long response times on remote routes. This article supports hands-on training—it does not replace it. Pair training with the right kit for the best outcomes.
Good outcomes look like stopping major bleeding, keeping the airway clear, preventing shock, and stabilizing injuries until EMS takes over. If you ride solo or in a group, this primer helps you act fast and smart.
Why first aid matters more when you ride
Remote routes change a simple crash into a prolonged emergency more often than you’d expect. Riders are exposed; the same impact that barely dents a car can cause major bleeding and broken bones on a bike.
Motorcyclists face higher vulnerability and faster escalation. Data shows crashes are far deadlier for riders, and the first few minutes often decide whether injuries progress to shock or airway problems.

How delayed help alters the timeline
If EMS is hours away, your actions form the bridge to professional care. Rapid bleeding control, shock prevention, and simple stabilization matter more on backroads, forest tracks, and desert highways.
Practical mindset and group complexity
- Stay focused on life threats: airway, severe bleeding, and shock.
- Manage the scene: traffic control, calling 911, and coordinated care among riders.
- Expect unreliable cell service in many situations and plan accordingly.
Preparation lowers risk. A calm rider with basic knowledge, a compact kit, and a clear plan reduces panic and improves outcomes when emergencies happen.
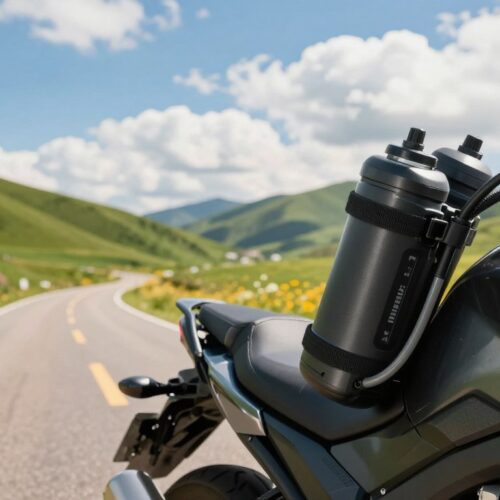
Build a motorcycle-ready first aid kit and pack it for fast access
On remote roads, reachable supplies beat larger, buried kits every time. A compact first aid kit should combine trauma tools with basic wound care and a plan to grab it in seconds.

Trauma essentials for serious bleeding and rapid gear removal
Keep trauma shears, sterile gauze and heavy dressings on top so you can cut through heavy riding gear fast. Add an elastic pressure bandage and a small roll of gauze to pack and compress severe bleeding.
Wound care basics to reduce contamination and infection risk
Include saline to rinse grit, antiseptic wipes, and adhesive bandages in multiple sizes to cover road rash and blisters. Pack hydrogel dressings for deep abrasion protection.
Burns, swelling, and exposure management items
Put burn gel, an instant cold pack, and an emergency blanket in the main pocket. These items limit tissue damage, reduce swelling, and help prevent shock when a rider lies on cold ground.
Barrier protection and documentation
Store nitrile gloves and a CPR face shield to protect you while helping someone else. Add an emergency contact card listing meds, allergies, and who to call.
How to store your kit so it’s compact, waterproof, and reachable
Use a waterproof pouch with labeled compartments and place it in a top pannier or external pocket. Aim for one-reach access: you should open the bag without unloading gear.
- Quick checklist: trauma shears, gauze/dressings, elastic wrap.
- saline, antiseptic wipes, adhesive bandages.
- burn gel, instant cold pack, emergency blanket, nitrile gloves, CPR face shield, contact card.
Make the scene safe before you touch the injured rider
Pause at the edge of the road and assess hazards before moving in to help. A quick scan reduces the chance you become a second casualty and keeps the situation manageable.
Spot the hazards: traffic, fuel leaks, and unstable terrain
Look for oncoming traffic, blind corners, spilled fuel, smoking batteries, and unstable shoulders or gravel. Identify what you can control and what needs urgent action.
Controlable steps: position bikes to block traffic when safe, switch on hazard lights, and lay out reflective gear to warn drivers. Assign one person to watch traffic and call for help.
Decide when to move to safety and when not to move the rider
Move the injured rider only if an active, life‑threatening danger exists — for example, a fire, an uncontrolled oncoming vehicle, or a collapsing embankment. If you must move someone, protect your own body first and move them a short, steady distance to safety.
Do not move the rider when you suspect head, neck, or spine injury, when consciousness is unclear, or when they report severe pain. Unnecessary movement can worsen spinal or internal injuries. Stabilize and wait for professional help when conditions allow.
- Pause and scan the situation before you act.
- Use bikes and reflective gear to create a visible buffer on the road.
- Keep people upwind of any leaking fuel and away from the downed bike.
- Move someone only to prevent immediate danger; otherwise, protect and stabilize until help arrives.
Call 911 and communicate like a pro
When an incident happens on a remote road, your call can be the single best tool to speed help. Speak slowly and stay calm. Clear information saves responders precious time and avoids confusion.
What to report right away
Give exact location: GPS coordinates when possible, plus a nearby landmark, mile marker, or intersection. State the direction of travel so crews can approach safely.
Use GPS and local markers
Pair coordinates with a trail name, bridge, store, or sign so dispatch can triangulate your position faster. This matters most when cell towers are sparse.
Keep the group coordinated while you wait
Assign roles: one person stays on the phone, one provides care to the injured rider, and one manages scene safety. Track key data like crash time, when bleeding control began, and any changes in responsiveness.
- Be concise: number of people, consciousness, breathing, and major bleeding.
- Describe actions: what you are doing now (direct pressure, airway support, warming).
- Log time: note when the event occurred and when interventions started.
First aid skills for motorcycle travelers: assessment, CPR, and life threats
When adrenaline spikes after a crash, a clear routine keeps you effective and steady. Start every assessment with the ABCs: airway, breathing, circulation. That order helps you find life threats fast.
Start with the ABCs: airway, breathing, circulation
Check responsiveness, then open the airway and look for normal breathing. At the same time, scan the chest and body for severe bleeding that can stop circulation.
When to begin CPR and hands-only options
If the rider is unresponsive and not breathing normally, begin CPR immediately. If you cannot give rescue breaths, do hands-only chest compressions at 100–120 per minute.
If you are trained and can do breaths safely, use a 30:2 compression-to-ventilation ratio. Move the rider only as needed to get a flat, firm surface.
Reduce infection risk while providing aid
Use a CPR face shield from your kit and wear nitrile gloves when fluids are present. These steps lower infection risk and protect both you and the patient.
- Keep simple priorities: air in, blood moving.
- Keep compressions steady; compress hard and fast in the center of the chest.
- Seek formal training and refresh it regularly to improve confidence and technique.
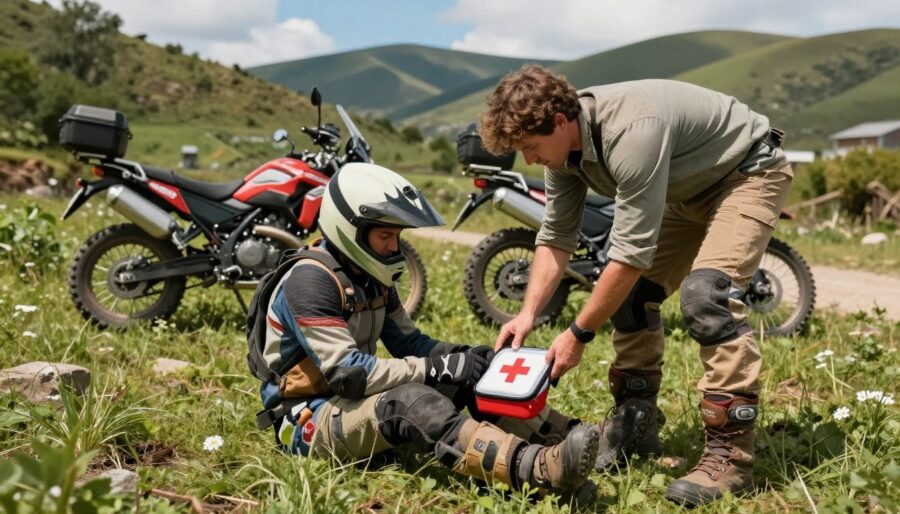
Handle common motorcycle injuries without making them worse
After a crash, quick, calm actions prevent small injuries from becoming life‑threatening. Focus on immediate threats: severe bleeding, shock, and any possible spine injury. Work methodically and protect yourself with gloves from your gear.
Control severe bleeding
Apply firm direct pressure with gauze or a clean cloth and secure it with a bandage so pressure stays steady. If the dressing soaks through, add layers—do not remove the original pad.
When to use a tourniquet
Use a tourniquet only for life‑threatening limb bleeding that won’t stop with pressure. Training matters: correct placement and documentation reduce complications. If applied, note the time and tell EMS.
Recognize and manage shock
Shock follows major blood loss or trauma. Keep the injured rider warm with an emergency blanket, raise their feet if no spine injury is suspected, and monitor breathing and responsiveness continuously.
Stabilize fractures and protect the spine
Limit movement and support the limb in the position found. Use a splint or improvised padding—a rolled jacket or sturdy stick—secured gently.
For head and neck concerns, manually stabilize the head and avoid moving it. Do not remove a helmet unless it blocks breathing or you are trained to do so.
Care for road rash and blisters
Rinse grit with saline, gently clean around the abrasion, and cover with a sterile dressing to reduce infection risk. Treat blisters by cleaning and protecting them to prevent larger problems later.
- Quick checklist: pressure dressings, tourniquet (trained use), emergency blanket.
- stabilize fractures with splints or padding, protect head/neck, clean and dress abrasions.
- monitor the injured rider and keep the scene safe until EMS arrives.
Train for the moments you can’t predict, especially in remote riding
Training is the difference between panic and action when a roadside emergency happens. Choose a course that teaches severe bleeding control, care of an unconscious casualty, practical CPR, and AED use so you learn procedural responses, not just theory.
What to look for in a course
Pick classes that include hands-on practice with tourniquets, direct pressure, and casualty checks. An AED module and live CPR practice build muscle memory.
Practice with your gear before the trip
Run drills while wearing your riding gloves and jacket. Open your kit, cut through layers with trauma shears, and rehearse packaging dressings so you act fast when you are stressed.
Stay calm and think survival priorities
When help is far away, focus on shelter, warmth, water, and signaling. Conserve energy and keep actions simple and ordered.
Signaling if devices fail
- Sound: whistle or horn blasts in sets of three.
- Visibility: mirror flashes, bright clothing placed high, or a ground “X” in high-contrast material.
- Fire: use safe smoke or flames only where permitted and safe to do so.
Know your limits
Stabilize, prevent deterioration, and hand over care to EMS. Avoid procedures beyond your training—confidence comes from realistic practice, not overreach.
Conclusion
Your checklist—kit, scene control, clear calls—becomes a lifeline when help is delayed.
Carry a compact, waterproof first aid kit that you can reach without unpacking the bike. Train so you can use its contents under pressure and keep gloves, dressings, and barrier tools ready.
After a crash, make the road safe, call 911 with precise location details, follow ABCs, and stop life‑threatening bleeding or shock. Stabilize injuries and know your limits until responders arrive.
Restock used items, replace expired supplies, and run quick practice drills before any adventure. Use this guide as a pre-ride checklist and ride prepared.