You ride with purpose, and your gear should match that intent. An advanced first aid kit is more than bandaids and antiseptic wipes. It includes “don’t die” solutions for serious crashes or remote rides.
Think modular: carry a compact motorcycle medical kit on your person for day rides. Keep a larger pack on the bike for longer trips. For short outings, plasters, antiseptic wipes, and lightweight dressings are enough. For remote or backcountry routes, add a SAM splint, triangle bandage, and extra gauze.
A physician-recommended baseline includes a CAT tourniquet, an EpiPen, an Israeli bandage, and two 14-gauge decompression needles for shorter day rides. For extended trips, add a SAM splint, clotting sponges, and more wound-care supplies. This builds a true advanced first aid kit.
Storage and pre-made options matter. Use Sea to Summit 2L dry bags to keep supplies dry. Consider quality packs like MyMedic Cycle Medic and Biker Med Pack. These motorcycle first aid kit essentials make it easier to access critical tools when seconds count.
Training is the last piece. Carrying a motorcycle medical kit won’t help unless you know how to use it. Pursue courses such as Cycling UK’s Bike First Aid or First Aid in the Outdoors. This way, your first aid on the road is calm and effective.
Understanding the Importance of a Motorcycle First Aid Kit
Even skilled riders can have accidents. On long, remote roads, you might face serious injuries like bleeding, airway blockage, or a collapsed lung before help arrives. A well-stocked motorcycle first aid kit can help you keep a rider stable until help gets there.
Having the right motorcycle first aid kit can save precious time. Wearing a compact kit on your body lets you quickly reach a rider in need. While GPS devices like Garmin inReach can call for help, they can’t replace the need for first aid skills.
Choose your kit based on your route. For short rides, you might just need supplies for minor cuts and scrapes. But for long, remote trips, you’ll need more for fractures, head wounds, and weather-related issues. For extended trips, remember to pack extra dressings and a portable charger for your phone and GPS.
Opt for a modular advanced first aid kit. This way, you can customize it for different types of rides. It’s light for city trips and packed with trauma gear for off-road adventures. With the right training and kit, you can help a fellow rider and keep them alive until medical help arrives.
| Ride Type | Likely Injuries | Recommended Kit Focus |
|---|---|---|
| Short road commutes | Scrapes, minor cuts, abrasions | Basic wound care, antiseptic wipes, bandages |
| Weekend backroad rides | Sprains, fractures, deeper lacerations | Trauma dressings, SAM splint, tourniquet, hemostatic gauze |
| Remote solo touring | Severe hemorrhage, head injury, prolonged self-care | Advanced first aid kit modules, airway adjuncts, extra dressings, portable charger |
| Bikepacking & multi-day trips | Exposure, infection, delayed evacuation | Expanded medications, sterile packs, shelter supplies, durable motorcycle medical kit case |
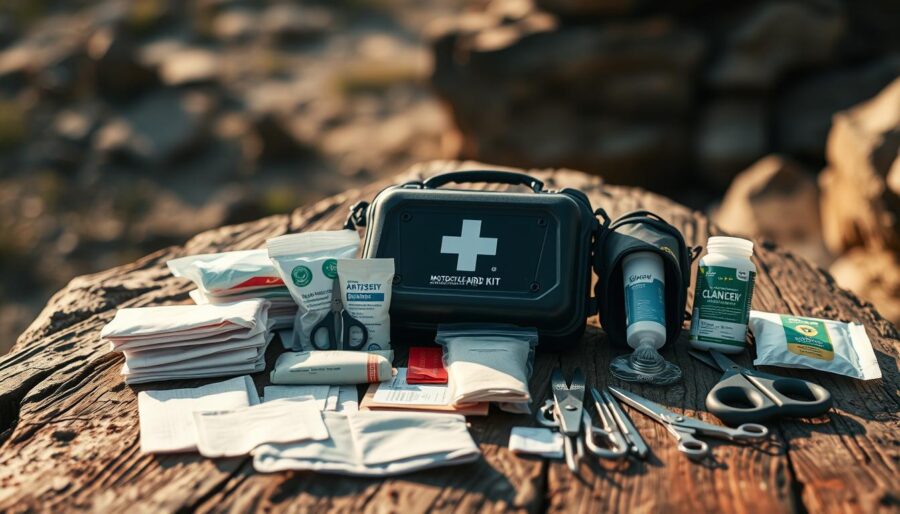
Essential Items for Your First Aid Kit
Keep a small kit for cuts, burns, and sprains. Include 4×4 gauze pads, a gauze roll, and bandages. Don’t forget a triangle bandage and butterfly bandages.
Add medical tape and elastic bandage for support. Gloves and antiseptics are also important. They prevent infection and protect you.
For pain, carry ibuprofen and acetaminophen. Moleskin prevents blisters, and a SAM splint is for fractures.
For longer trips, add trauma items. A clotting sponge, tourniquet, and Israeli Emergency Bandage are for serious bleeding. Medical shears and ice packs help with dressings and swelling.
Adjust your kit based on ride length and riders. Waterproof plasters and hand sanitizer are good for short trips. For kids, include smaller bandages and pain relief.
Make sure your kit is light and compact. Choose high-quality, lightweight items. Store them in a waterproof pouch.
| Category | Items | When to Use |
|---|---|---|
| Basic wound care | 4×4 gauze pads, adhesive bandages, butterfly bandages, medical tape | Cuts, abrasions, minor lacerations |
| Infection control | Antiseptic wipes, alcohol prep pads, antibiotic ointment, hand sanitizer | Cleaning and dressing wounds |
| Protection & tools | Nitrile gloves, medical shears, tweezers, small scissors, waterproof pouch | Safe handling, removing debris, cutting clothing |
| Pain & prevention | Ibuprofen, acetaminophen, sunscreen, moleskin | Pain control, sun protection, blister prevention |
| Stabilization | SAM splint, elastic bandage, triangle bandage | Sprains, suspected fractures, immobilization |
| Trauma additions | Tourniquet, clotting sponge, Israeli Emergency Bandage, instant ice packs | Severe bleeding, major trauma, swelling control |
| Child-specific | Smaller dressings, child-appropriate pain medicine, waterproof plasters | Rides with kids or family groups |
Trauma Care Items to Consider

It’s important to have items for severe bleeding, airway issues, and broken bones. A Combat Application Tourniquet (CAT) and a good tourniquet are key for riders who travel far. They stop blood loss until help arrives.
Include an Israeli Emergency Bandage and a blood-clotting sponge for deep wounds. These work well with gauze and tape to stop bleeding fast. Don’t forget nitrile gloves to keep you and the casualty clean.
For breathing problems, an EpiPen and a 10cc syringe are useful if you know how to use them. A cuffed endotracheal tube and a #10 scalpel are vital, but only if you’re trained.
Immobilization gear is crucial on rough roads. A SAM Splint, triangular bandages, and rigid splints help with fractures. A safety blanket and a light are also important for night rescues or delays.
Make your first aid kit compact and focused. Two 14g decompression needles are needed for chest trauma, but they require training. Clearly label these items so only trained responders use them.
Consider the weight and ease of access when making your kit. Choose items that are lightweight and versatile. Include a checklist and simple instructions to help you stay calm in emergencies.
| Item | Purpose | Skill Level Needed |
|---|---|---|
| Combat Application Tourniquet (CAT) | Stop severe extremity bleeding | Basic training recommended |
| Israeli Emergency Bandage | Compress and dress large wounds | Basic |
| Blood-clotting sponge (e.g., QuikClot) | Promote rapid clotting on deep bleeds | Basic with caution |
| Two 14g decompression needles | Relieve tension pneumothorax | Advanced |
| SAM Splint | Immobilize fractures | Basic |
| Cuffed endotracheal tube & #10 scalpel | Secure airway when needed | Professional only |
| EpiPen auto-injector | Treat severe allergic reactions | Basic |
| Safety blanket & light | Prevent hypothermia; improve visibility | No skill required |
Protective Gear: Keeping Your Kit Safe
Keep your motorcycle medical kit dry, compact, and easy to reach. A 2L Sea to Summit dry bag is perfect for small kits. It keeps moisture out on wet rides. For bigger collections, store a base kit in your vehicle or camp.
Carry a compact kit on your body for quick access. A lumbar pack or backpack is great for motorcycle first aid kit essentials. This way, you can grab what you need fast. For long trips, keep on-bike supplies in a top case but make sure they’re easy to grab.
Use waterproof containers and lightweight pouches to protect your gear. Small waterproof bags keep gauze and bandages from sticking together. Organize your items so you can find what you need without digging.
Ensure your advanced first aid kit stays charged and connected. Store a portable charger and a powered emergency communicator with the kit. This way, you can call for help even if your phone dies. Check seals, zippers, and closures often to avoid surprises when you need them most.
Label compartments for quick use and keep a simple checklist inside the bag. Regular checks help restock essential medical supplies. This keeps your kit ready for any situation.
Advanced Treatments for Serious Injuries
An advanced first aid kit might include tools like decompression needles, endotracheal tubes, or a scalpel. These items can help in life-threatening situations.
Using these tools requires formal training. Courses like Wilderness First Responder, EMT, or paramedic programs teach how and when to use them safely.
Always call 911 and move the patient to higher care as soon as possible. Using advanced tools without proper training can make injuries worse.
Basic first aid and wilderness trauma courses teach when not to intervene. This knowledge is crucial for rider safety.
Carrying GPS messengers and emergency beacons can help get professional help when needed. These tools improve your first aid response on the road.
Cycling UK recommends Bike First Aid and First Aid in the Outdoors for leaders. These programs focus on CPR, AED knowledge, and making smart decisions.
Stick to treatments you are trained for. Your goal is to stabilize and protect until paramedics arrive, not to perform definitive care.
| Intervention | When to Use | Training Recommended | Risk if Misused |
|---|---|---|---|
| Decompression needle | Suspected tension pneumothorax with severe respiratory distress | EMT, Paramedic, Wilderness First Responder | Infection, organ damage, failure to relieve pressure |
| Endotracheal tube | Airway obstruction not relieved by basic maneuvers | Paramedic, Emergency Medicine training | Incorrect placement, aspiration, airway trauma |
| Scalpel for surgical airway | Complete airway failure with no other option | Advanced airway course, surgical training | Severe bleeding, permanent airway damage |
| CPR and AED | Cardiac arrest | Basic Life Support, CPR certification | Ineffective compressions if untrained, delayed defibrillation |
| GPS messenger / emergency beacon | Remote incidents where cell service is poor | No medical training required | Delay in rescue if not activated properly |
For most riders, a well-stocked motorcycle medical kit is best. It should have clear limits on advanced care. Focus on motorcycle first aid kit essentials, solid training, and quick access to professional help.
First Aid Kit Size: How Much is Enough?
You don’t need the same size first aid kit for every ride. A small pouch is perfect for short trips and errands. It has basic items like bandages and antiseptic wipes without being too heavy.
For longer trips or solo rides on remote roads, you’ll need more. Add clotting sponges, an Israeli bandage, and a tourniquet to your kit. These items are crucial when help is far away.
For longer tours or group rides, carry a more advanced kit. Include sterile dressings, chest seals, and a compact splint. Don’t forget extra gloves and pain relievers for different hazards.
Use a modular approach to stay flexible. Carry a small core kit for daily use and add trauma items for riskier trips. This way, you avoid carrying too much and still have what you need.
Choose the right kit size based on the group and the remoteness of your trip. For groups, have duplicates of important items and extra supplies. Solo or paired riders should focus on lightweight, space-saving items like hemostatic dressings.
| Ride Type | Recommended Kit | Key Contents | Pack Size |
|---|---|---|---|
| Commute / Short Trips | Compact motorcycle first aid kit essentials | Bandages, antiseptic wipes, small scissors, basic meds | Small pouch, fits under seat |
| Day Trip / Remote Roads | Motorcycle medical kit + trauma add-ons | Israeli bandage, clotting sponge, tourniquet, gloves | Medium pouch or tank bag kit |
| Multi-Day / Bikepacking | Advanced first aid kit | Sterile dressings, splint, chest seal, extra meds | Small soft case or pannier-ready kit |
| Group Rides / Remote Expeditions | Multiple kits scaled to group size | Extras of essential medical supplies, shared trauma gear | One advanced kit + backups |
Balance weight and ease of access. Test different layouts on short rides to find what you’ll carry. This practice keeps your kit useful and ready when needed.
User-Friendly Labels and Instructions
Make your motorcycle medical kit easy to use. Use clear, waterproof labels on pouches and items. This way, you can quickly find things like tourniquets, EpiPens, and hemostatic dressings.
Put important items where you can see them and reach them easily. This means you don’t have to empty the whole kit to find what you need.
Include a small instruction card in your kit. It should cover basic first aid steps. Keep it simple with numbered, short steps. This is helpful when you’re stressed and it’s dark.
Pre-made kits from brands like MyMedic come with everything labeled and diagrams. They can save you time. But, always check the contents and add any personal items you need.
Practice using the tools before you go on long rides. Do quick drills with your group. This way, at least one person knows how to use the kit and a GPS messenger.
Mark the kit’s location on a group checklist. This makes sure everyone knows where to find it.
Use bright tape for tourniquets, red for airway tools, and a separate pouch for medications. Small pictograms or bold headings help identify items quickly, even in low light.
Keep a list of your motorcycle first aid kit essentials inside the case and on your phone. Include items like bandages, hemostatic dressings, gloves, and any prescription medications. Check expiry dates and order more supplies before they run out.
Pain Management Essentials for Riders
Keep basic, safe pain relief in your motorcycle first aid kit. Use over-the-counter ibuprofen and acetaminophen for minor aches and soft-tissue injuries. Make sure doses are in their original packaging and check expiration dates.
Know when to give medication and when to seek professional help. Don’t give prescription drugs unless you’re trained and the rider has their own, like an EpiPen for severe allergies.
Include ibuprofen gel for strains and small bruises, especially if swallowing pills is hard. Add medical shears to quickly access wounds and apply essential medical supplies.
Use clear labels and simple instructions so anyone can find pain relief easily. A compact advanced first aid kit should have separate sections for pills, gels, and emergency meds. This helps avoid confusion in stressful situations.
Be careful with aspirin for suspected heart attacks. Only use it if there’s no allergy and the patient is 16 or older. First aiders should not recommend stronger analgesics unless they are qualified.
Make a checklist for regular checks of your pain management essentials. Restock used items and replace expired products. This keeps your essential medical supplies ready for your next ride.
Guidelines for Regularly Updating Your Kit

Make your motorcycle medical kit modular. This way, you can adjust it for each ride. For short trips, carry a small set of essentials like bandages, wipes, and gloves. For longer rides, add bigger dressings, a tourniquet, and more gauze.
Before every ride, check your kit’s consumables. Replace anything used and check expiration dates on meds, EpiPens, and hemostatic agents. Stock up on trauma supplies for remote trips to avoid shortages.
Check your waterproof pouches and seals to keep items dry. Make sure batteries in lights, headlamps, and GPS are charged. Include a portable charger in your kit to keep your phone charged in emergencies.
Review your antiseptic wipes, dressings, and pain meds every month. Replace anything that’s no longer good. In summer, add sunscreen and electrolyte packets. In winter, include foil blankets and cold-weather dressings.
Keep a checklist in your kit to track what you have and when it was last updated. Mark when you need to check it again. This keeps your kit up-to-date and ready for emergencies.
Training: Preparation is Key
Before you need it, take formal courses on first aid. The American Red Cross, NOLS, and REI offer classes. They teach CPR, bleeding control, and how to assess patients.
These programs let you practice in real scenarios. They also boost your confidence in using your first aid kit.
For more advanced skills, look into Wilderness First Responder or EMT/Paramedic programs. These cover advanced care and when to use your kit. You’ll learn about decompression, tourniquets, and EpiPen use.
Find short, practical courses on wilderness trauma and on-road rescue. Many community colleges and volunteer ambulance services offer these. Repetition is key; practice your skills before long rides.
Use the exact gear you carry for training. Practice using an Israeli bandage and a CAT tourniquet until you’re quick and accurate. Regular drills help you remember these skills in stressful moments.
CPR and AED training are crucial. The American Heart Association offers hands-on certification. Only trained first aiders should use advanced care from your kit.
Lastly, share your skills with your riding group. Short refresher sessions and scenario drills keep everyone up-to-date. Regular training makes your first aid kit a reliable tool in emergencies.
Utilizing Technology in Emergency Situations
Always carry reliable communication devices when riding. A fully charged mobile phone and a portable power bank are essential. They ensure you can quickly get help for first aid on the road.
Save emergency contacts and set GPS waypoints for nearby hospitals. This way, you can call for backup fast.
Think about using a dedicated emergency communicator like SPOT, Garmin inReach, or a Personal Locator Beacon. These devices send SOS messages even when cell service is out. Keep one on your body so you can call for help if you get lost from your bike.
Combine tech with training and a good motorcycle medical kit. Practice sending an SOS and using your phone to share your location. Relying only on gear is not enough; your skills and a well-stocked kit are key.
For long trips, have a larger first aid kit at your vehicle or basecamp. Keep a smaller kit on your bike with essentials for bleeding control and immobilization. The larger kit can have more dressings, a splint, and medicines you might need later.
Make a group plan before you ride. Make sure each rider knows where the emergency communicator and first aid kit are. Teach everyone how to use devices, share waypoints, and reach local emergency services. This speeds up help during first aid on the road.
Use a simple checklist to keep tech and supplies ready. Charge batteries, test SOS functions, update contact lists, and rotate supplies in your advanced first aid kit. Regular checks ensure your tools work when you need them most.
Packing Your Kit for Long Rides

For long or remote rides, you need more than the basics. Include a SAM splint, triangle bandage, extra gauze, and hemostatic dressings. Use a Sea to Summit 2L dry sack to keep everything dry and organized.
On adventure routes, carry a Day Tripper kit and a trauma module. This module should have a tourniquet, clotting sponge, and an Israeli bandage. Don’t forget shears and instant cold packs. Make sure the kit is easy to access from the saddle or tail bag.
For bikepacking, add a foil survival blanket, headlamp, extra dressings, insect repellent, tweezers, and sunscreen. Use a waterproof bag. Scale the supplies by group size so everyone can share if needed.
Organize your kits in tiers. Have a compact on-bike kit for quick responses, a larger kit in your vehicle, and a base-camp cache for longer trips. Label compartments and use clear pouches for fast access during emergencies.
Below is a sample packing guide to help you choose items by trip type and priority.
| Trip Type | Core Items | Trauma Add-ons | Storage Suggestion |
|---|---|---|---|
| Day Ride | Sterile gauze, adhesive bandages, antiseptic wipes, basic meds | Small tourniquet, Israeli bandage | Compact on-bike pouch |
| Adventure/Remote | Everything in Day Ride plus SAM splint, extra gauze, foil blanket | Hemostatic dressing, larger tourniquet, shears, instant cold packs | Tail bag in Sea to Summit 2L dry sack |
| Bikepacking / Multi-Day | All core items, sunscreen, insect repellent, tweezers, headlamp | Clotting sponges, backup dressings, extra medication doses | Waterproof roll or dry sack at camp; spare module in vehicle |
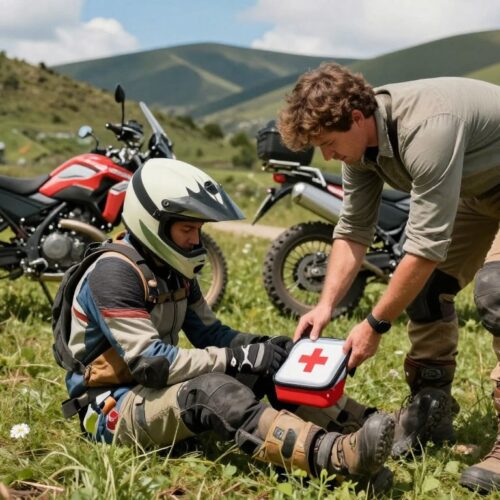
Real-Life Scenarios: How to Use Your Kit
You crash on a remote trail. First, check for life threats like heavy bleeding or trouble breathing. Stay calm and use your kit to apply pressure or a CAT tourniquet. Call 911 if the bleeding doesn’t stop.
For severe wounds, grab items like an Israeli bandage and clotting sponge from your kit. Apply pressure and pack the wound. Use an EpiPen if the rider has hives or trouble breathing.
Broken limbs need immobilization. Use a SAM Splint or a triangular bandage to stabilize fractures. Keep the injured still and warm. Don’t move someone with a possible spine injury unless it’s to avoid danger.
Road rash and cuts are common. Clean with antiseptic wipes and cover with a dressing. Don’t probe for debris; seek urgent care if the wound is large.
Tension pneumothorax is deadly. Only trained responders should use a decompression needle. If you suspect a collapsed lung, call 911 and keep the rider calm.
Be creative with what you have. Use clothing for a sling or pad a rigid object for a splint. These can help until you get to a hospital.
Practice using your kit before you ride. Know where everything is. This quick thinking can save lives.
Sharing Your Knowledge with Fellow Riders
Sharing skills and gear is key on every group ride. Discuss who will carry the first aid kit before you start. This kit should include things like a tourniquet and an EpiPen.
Consider using modular kits. This way, members can add or swap items based on their role. For example, one rider might carry a trauma kit, while another has a medical kit with oxygen.
Make sure everyone knows each other’s emergency contacts and medical conditions. Use tools like MyMedic for those without supplies or training. Choose leaders to carry a bigger first aid kit and a GPS messenger.
Each rider should also have a small kit with them. This ensures everyone is prepared for emergencies.
Practice using the gear in scenarios to get comfortable with it. Take courses like Bike First Aid to improve your skills. Share supplies like blankets and chargers to help the whole group.
Never assume someone else has the right equipment or training. Always be prepared and ready to help.