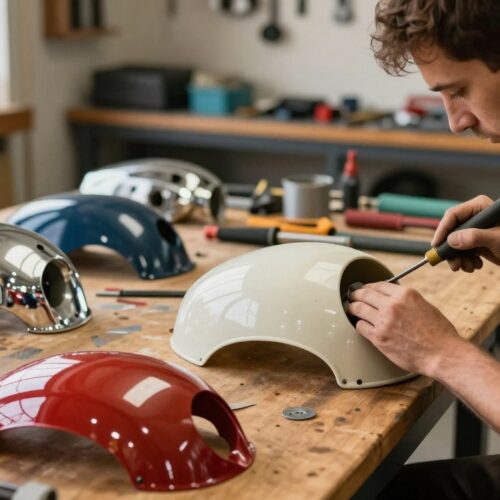
You work on your bike to keep it safe and reliable. A manufacturer sets exact torque specifications for nearly every fastener. Relying on “tight enough” risks loose parts from vibration or damaged threads from over-tightening.
Using a torque wrench gives you a measured, repeatable clamping force that protects parts and keeps your bike running true. This tool makes common tasks—oil changes, brake work, spark plug service—consistent and safer for riding.
This guide shows where to find manufacturer specifications, how to choose the right wrench, and how to apply torque correctly in a real garage. You’ll learn practical steps you can use now, framed for U.S. riders and the units you’ll encounter.
What torque means on a motorcycle and why it’s different than “tight enough”
When you turn a wrench, you apply a twisting force that controls how parts clamp together.

Torque is the rotational analogue of linear push. In plain terms, it is the twist you put on a nut, bolt, or other fasteners when you use a wrench. That twist becomes clamping force that actually holds parts together.
“Tight enough” relies on feel. Your grip, tool length, and leverage change what you think is enough. Measured torque is repeatable; feel is not.
Common units and the math
In the U.S. you’ll see foot‑pounds (ft‑lb) and Newton‑metres (N·m). Manuals may list one or both for global readers.
- Basic relationship: Nm = F × L (force times lever length).
- A longer handle raises the twist for the same pull.
- Different wrenches and handle lengths change outcomes—so calibration and correct use matter.
Most mobile pages format torque charts for quick lookup, so you can read values on your phone while working in the garage.
motorcycle torque specs importance for safety and reliability
Vibration is an invisible attacker; proper tightening is your defense against parts coming loose. Fasteners on two‑wheeled machines live in a harsh, vibrating environment. Under‑tightened bolts can back out, cause rattles, and create unsafe failures while you ride.

How correct torque prevents loosening
Measured values resist vibrational loosening by keeping clamp load stable. That prevents bolts from working free and stops small issues from becoming big ones.
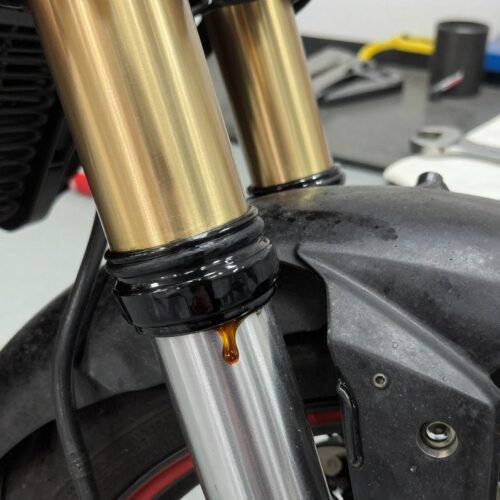
Why values matter for brakes and steering
Your stopping and control depend on proper clamping. For example, Motousher warned that under‑torqued front brake caliper bolts—21 Nm on a Triumph Street Twin—can come loose and risk braking failure.
How clamping force supports engine performance
Correct tightening keeps seals and alignments consistent around spark plugs and combustion parts. That reduces misfires and helps the engine run smoothly.
- Reduces random rattles and repeat tightening cycles.
- Protects critical components like brakes and steering from failure.
- Makes service repeatable: you get the same result every time.
Where your motorcycle’s torque specifications come from
Engineers determine fastener settings so each joint holds without harm under real use. The factory runs tests, measures clamp loads, and sets numbers to match each part and its role.
How manufacturers set the numbers
Your manufacturer bases values on fastener size, material pairings, operating temperature, and the load or vibration the assembly sees.
Steel-to-aluminum interfaces, for example, need lower settings to avoid thread damage. A small bolt on a bracket can have a very different value than a visually similar bolt holding an engine cover.
Where to look for the right values
- Owner’s manual — basic, safe values for common maintenance.
- Service manual — full description and factory specifications for deeper work.
- Trusted online publishers — use only after you verify model and year match.
Before you trust a source, check the model/year, prefer reputable publishers, and cross-check if a value looks unusual. Understanding where these values come from makes it easier to respect them — especially when you’re tempted to add a little extra.
What happens when you over-torque fasteners
Applying too much twist to a bolt can turn routine service into a costly repair.
You keep turning after the joint is already clamped. That extra force has to go somewhere. Usually it goes into damaged threads or a stretched fastener.
Thread stripping and damaged components
Soft alloy parts are common on modern bikes. A steel bolt into an aluminum hole often wins—by stripping the threads in the softer material.
How bolts can stretch past their elastic limit
Over-tightening can pull a bolt beyond the elastic limit so it won’t spring back. It may still feel tight but it no longer holds preload correctly and can fail later.
Real-world example: on a Triumph Street Twin the drain bolt is 25 Nm. Overtightening a steel drain bolt into an aluminum oil sump can strip the sump threads and turn a simple oil change into an expensive repair.
- Rounded head when you fight a stuck bolt.
- Damaged threads requiring a helicoil or sump replacement.
- Hidden bolt stretch that leads to future failures.
Takeaway: follow the specified value—“just a little more” often starts the chain that ruins threads, bolts, and nearby parts.
What happens when you under-torque fasteners
Insufficient clamping lets vibration do the work of loosening fasteners over time. Without the right clamp load, a bolt that seemed fine in the garage can slowly back out after repeated riding.
Early warning signs are often audible or tactile. You may hear new rattles, feel increased vibration, or notice a change in how the bike responds. Don’t ignore these cues—small noises can point to fasteners working loose before parts fail.
Rattles, vibrations, and bolts backing out over time
Vibration and load cycles can walk a bolt out even if it looked snug earlier. That process is slow but steady; minor movement lowers clamping force and lets components shift more.
Real-world risk: loose brake caliper bolts and braking failure
Brakes are a clear example where under-tightening can become dangerous. Motousher warns that under-torqued front caliper bolts—21 Nm on a Triumph Street Twin—may come loose and jeopardize braking reliability.
- Why it matters: a backing‑out caliper bolt can change pad alignment or let the caliper shift under braking.
- Subtle effects: leaks, misalignment, and accelerated wear often follow under-torque before anything falls off.
- Fix it right: use a calibrated wrench so you hit the intended value every time.
How to choose the right torque wrench and sockets for motorcycle work
A good wrench selection starts with matching the tool to the jobs you do most. Pick a torque wrench with a range that covers common bolts and axle fasteners so you avoid working at either extreme of the scale.
Drive size and range:
- Use a 3/8″ drive for most engine and chassis parts; a 1/4″ for small fasteners and a 1/2″ for axle or wheel bolts.
- Choose a lower-range wrench for smaller fasteners and a higher-range wrench for heavier work so each tool works in its optimal band.
Socket selection and thread care:
- Select the exact socket size and good-quality sockets to avoid rounding bolt heads or nuts.
- Hand-fastening first, clean threads, and light lubrication only when the manual allows will control friction and give consistent readings.
Practical tips: look for clear markings, a secure lock, and a positive click. Treat the wrench as a precision tool: store it, avoid dropping it, and recalibrate as recommended.
How to torque a motorcycle bolt correctly with a torque wrench
Every correct clamp starts before the wrench ever leaves your hand. A simple, repeatable routine helps you get consistent results and avoid damage.
Start by hand: thread engagement, snugging, and alignment
Choose the correct socket and thread the bolt by hand until it runs easily. That prevents cross-threading and confirms parts sit flush.
Snug the bolt with controlled turns by hand or a short ratchet. Snugging sets alignment without changing the final clamp with feel alone.
Set and lock the value
Set the reading on your wrench in the units the manual lists. Lock the setting so it can’t slip while you work.
Apply force smoothly and stop at the click
Fit the wrench squarely, pull clockwise with steady force, and stop when the tool clicks. Do not add extra turns after the click — that is how you over-tighten.
Remember lever length and friction
Nm equals F × L, so changing the lever length changes the applied torque. Do not extend the handle or grip the head; use the wrench the way it was designed.
Inspect threads and clean or replace damaged fasteners. Dirty threads or excess friction can make the reading lie, so check before you use torque values.
- Hand start and snug.
- Set and lock the wrench.
- Pull smooth, stop at the click.
- Respect lever length and check friction.
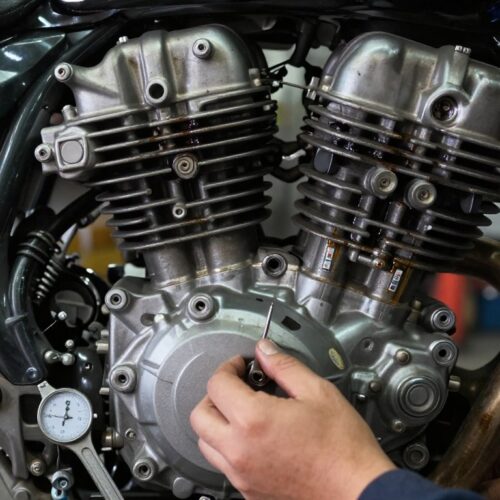
Torque-critical motorcycle components you should never guess on
Critical fasteners control how your engine breathes, cools, and stays together—so you can’t guess at their clamping force. Get the setting right and the bike runs clean; get it wrong and you chase vague problems.
Spark plugs: sealing the combustion chamber and preventing compression leaks
Spark plugs must seal the combustion chamber. If a plug is too loose, compression leaks reduce performance and cause rough running.
Spark plugs: avoiding overheating through proper heat transfer
Proper torque lets the plug transfer heat into the head as designed. That prevents hot spots that can hurt ignition and long‑term performance.
Spark plugs: protecting head threads and gaskets
Many cylinder heads are aluminum. Over‑tightening strips threads or stretches bolts. Under‑tightening lets vibration wear threads and may fail the seal.
Gasketed plugs must be compressed enough to seal but not so much that the gasket crushes. Both errors can lead to misfires and costly repairs.
Engine and chassis fasteners: where correct clamping matters most
Mounting points, structural joints, and alignment screws are other critical components. Use a wrench and look up the correct torque values—don’t guess. Proper settings protect parts, support steady starts, and improve overall engine performance.
Conclusion
A measured approach to fasteners saves time and prevents costly mistakes. Use a calibrated wrench and follow the manufacturer’s specifications to keep your bike safe and reliable.
Measured tightening protects parts from two common failures: over‑tightening that strips threads or stretches bolts, and under‑tightening that lets fasteners back out under vibration. Both happen when you guess instead of using numbers.
Keep torque values handy—owner’s manual, service manual, or a trusted reference—so you don’t improvise mid‑job. Start with the right wrench, practice the technique, and apply it to the bolts you touch most: drain plug, brake hardware, and spark plugs.
Make torquing a repeatable step: look up the value, prep threads, hand‑start, torque to value, and stop at the click. Mastering these steps helps your bike run safely and predictably today.