This guide explains what “night riding tips motorcycle” means in practical terms. After dark your sightlines shrink and your margin for error gets thinner. You will learn simple checks and habits to help you see, be seen, and react sooner.
The article serves as a how-to you can follow before every trip. Expect clear steps on improving visibility, choosing safer roads, and using defensive riding habits. The focus is U.S. road conditions, including rural stretches with limited lighting.
Key themes include lighting and gear, dealing with glare from oncoming headlights, and reducing risk from rain, frost, and black ice. You will get pre-ride checks, helmet and visor setup, speed and spacing advice, and tips for reading reflectors and lane markers.
Use these actionable steps to boost your confidence and safety. With practice and the right precautions you can ride more confidently after dark while keeping risk low.
Why Riding Motorcycle Night Feels Different and What You Need to Adjust
When daylight fades, the way you see textures, edges, and obstacles on the road shrinks. Your usable visual field becomes smaller and contrast drops, so potholes and debris can blend into dark patches until you’re near them.
Reduced visibility cuts reaction time. That means you should slow earlier and leave larger buffers than during daytime travel. Give yourself more following distance and plan your maneuvers sooner.

Common challenges and how they affect you
- Glare from oncoming headlights can dazzle and mask lane markings.
- Rain streaks a visor and reduces contrast; cold snaps bring frost.
- Black ice often hides in shaded spots, over bridges, and where water crosses the road.
When to slow down or change plans
If glare plus rain erases lane lines, if temperatures sit near freezing, or if fatigue builds, slow or postpone your ride. Smart choices often mean picking a safer pace or waiting until conditions improve.
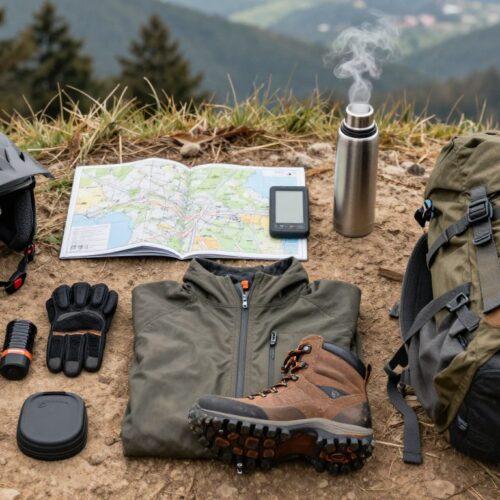
Pre-Ride Checklist to Illuminate Road Ahead and Stay Visible
A short pre-ride routine makes a big difference in how well you see and how easily others see you. Spend a few minutes on lights, lenses, and a quick mechanical scan before you go. This small habit directly improves your safety and the safety of other road users.

Confirm all lamps and indicators work
Walk through a lighting check: switch on the headlights and confirm high/low beams, test turn signals, and have someone press the brake so you can verify taillights and brake lights. Proper lights help you see and help drivers spot you.
Clean lenses to boost how lights illuminate road features
Even a thin film of road grime or salt cuts output. Wipe headlight and indicator lenses with a sponge or soft cloth at a fuel stop when possible. Clean lenses improve how your lights illuminate road ahead, revealing lane paint and debris sooner.
Consider auxiliary lights—but check local rules first
Auxiliary spotlights or fog lamps can enhance visibility on poorly lit or rural roads and make your presence clearer to drivers. Confirm local and state regulations before installing colored or indirect lights to avoid fines.
Fast mechanical scan for safer travel
- Check tire pressure and tread depth for proper grip.
- Test brake feel and lever response to ensure stopping power.
- Clean and position mirrors, check throttle and clutch for smooth operation.
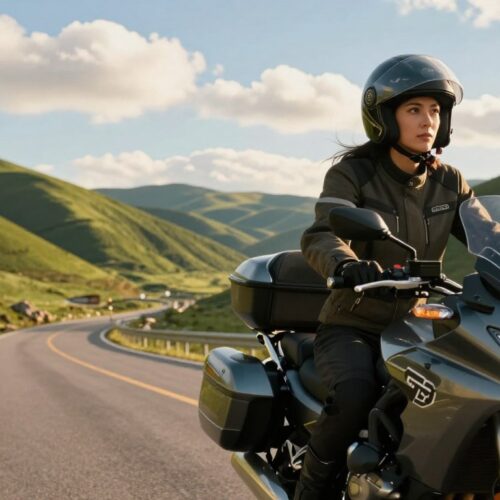
Gear and Helmet Setup for Nighttime Visibility and Comfort
Proper gear and helmet setup can make the difference between being seen early and being missed until it’s too late. Choose reflective clothing and hi-viz layers so drivers notice your silhouette sooner, especially when your headlight looks like another vehicle at a distance.
Prioritize the core silhouette: add reflective panels on your jacket or vest and trim on gloves and boots so movement draws attention. A bright helmet acts as a clear human cue, not just a single light dot.
Visor care matters: use a clear visor at night and replace scratched shields that scatter oncoming headlights. Pack visor spray and a soft microfiber cloth—paper towels can scratch and worsen glare.
- Install a Pinlock insert or use quality anti-fog spray to stop fogging.
- Apply water repellent to reduce rain glare and keep lane markers visible.
- Keep spare cloth and spray in a small pouch as part of your gear routine.
Small routines yield big gains: clean, scratch-free visors and reflective clothing improve visibility to drivers and increase your reaction time on dim roads.
night riding tips motorcycle Riders Can Apply to See the Road Ahead
Set your speed to match exactly what your low beam shows, not what you hope to see ahead. When you ride after dark, that simple rule reduces the chance of hitting unseen obstacles. Adjusting speed to real visibility gives you time to react and stay upright.
Ride at a pace that matches what your headlights actually reveal
Let the headlights define your pace. If the beam reveals 100 feet, choose a speed that lets you stop inside that space.
Overriding the light is common; prevent it by slowing earlier and keeping your focus farther up the lane.
Increase following distance to create more time to react
Give extra distance to the vehicle ahead so you have room if it brakes for debris or an animal. More gap equals more time to assess and respond.
Scan continuously for potholes, debris, and unexpected obstacles
Use an active scan: sweep the lane center, edges, and shoulder for contrast changes or movement.
- Look for potholes, tire carcasses, branches, and wildlife.
- Detect movement, then confirm before committing to a line.
- Keep smooth inputs—space and scanning cut abrupt corrections on cold pavement.
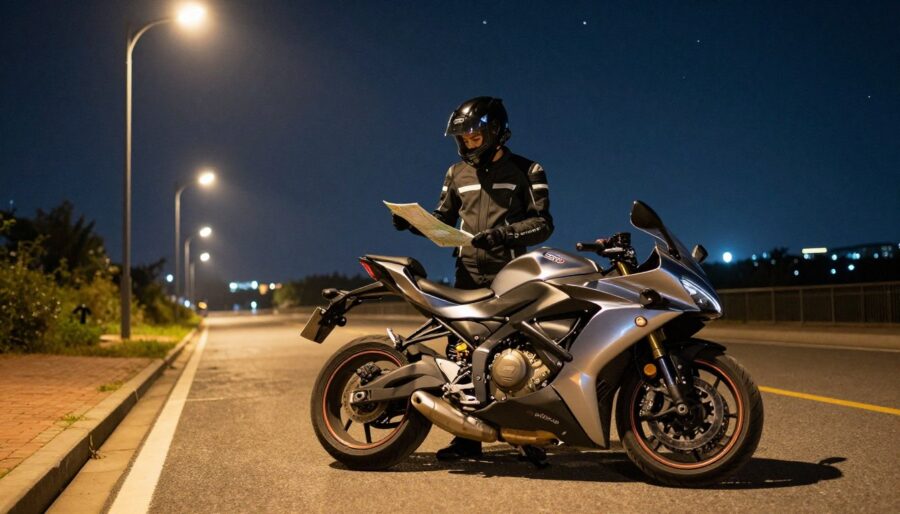
Route Choices That Make Riding Night Safer
Pick roads where lights and lane paint work for you, not against you, when visibility fades. Favor main roads and streets with steady illumination and clear lane markers over twisty backroads that hide bends and surface issues.
Well-lit routes give you more time to read the road ahead and spot driveways, intersections, and debris. They may be less scenic, but they deliver consistent visibility and make decision-making easier.
Use cat’s eyes and reflectors to anticipate changes
Cat’s eyes reflect your lights and outline bends, merges, and lane edges. A dense line of reflectors often marks double white lines or no-overtake zones—use that cue when you plan passing or lane changes.
Cold-weather and color cues
Major routes are more likely to be gritted in poor conditions, which lowers the risk of slick spots. Learn reflector colors so you orient quickly: red marks the hard shoulder, amber shows the outside lane, and green signals slip roads.
- Plan routes with streetlights first.
- Trust cat’s eyes to read bends when paint fades.
- Prefer gritted main roads in freezing conditions.
Managing Directly Oncoming Headlights Without Losing Focus
When another vehicle’s beams hit your eyes, your contrast and depth perception drop fast. This effect from directly oncoming headlights can hide lane markings and hazards for several seconds.
Use peripheral vision and avoid looking directly
Do not stare at the glare. Keep your eyes moving and use peripheral vision to monitor the oncoming vehicle while you focus on riding your path.
Anchor to the right edge of your lane
In the U.S., use the road’s right edge line as your visual reference. Hold a steady position relative to that edge instead of looking directly at the light source.
Respond calmly to suspected high beams
If you think the other driver has full beams, do not flash back. Reduce speed, maintain a steady throttle, and make small, smooth corrections so you do not drift when dazzled.
- Glare reduces sight quickly—give yourself more stopping time.
- Practice the edge-line tactic on safe, lit roads to build consistency.
- Staying calm and steady improves overall safety and reaction time.
Defensive Riding at Night: Spot Potential Hazards Earlier
You gain time and choices by scanning for subtle signs of trouble rather than waiting for obvious hazards.
Be cautious at intersections
Assume other road users have reduced visibility. Slow your approach, cover the brakes, and position so you can see drivers and be seen.
Give yourself extra distance and a clear escape lane. This buys time if a driver turns late or misses your signal.
Watch for wildlife and sudden movement
Scan shoulders for eye shine and motion near trees, fields, and water. Treat these zones as higher-probability crossing points.
Use non-visual clues to detect hazards
Smell diesel or notice mud dragged onto the pavement? Those cues often mean slick patches or slow farm traffic ahead.
Expect unlit trailers and tractors near fields and be ready to slow well before you reach them.
Read tail lights—but don’t link the dots
Use rear lights ahead to anticipate bends, but do not assume the line between them is straight. Dips, hidden turns, or debris can break the pattern.
Keep spacing so you have time to brake or change line smoothly. Early detection and calm responses reduce sudden maneuvers and lower risk in low-light conditions.
- Frame defensive riding as early detection: expect late turns and missed cues.
- Cover brakes, slow earlier, and keep an escape zone at intersections.
- Scan for animal movement, smell fuel, and watch for mud near fields.
- Use lights ahead to plan, but ride to what you actually see and keep distance.
Conclusion
C small routines before you go make big differences in how you handle low-light roads.
Apply the big three each trip: check your motorcycle lights, keep a clear visor, and ride to what you can actually see.
Plan routes with steady streetlights and reflectors so the road ahead gives reliable cues. Slow down when visibility drops and keep extra following distance.
When glare hits, avoid staring at oncoming beams. Use lane edges as anchors, stay steady, and do not escalate with other drivers.
Make the pre-ride checklist and gear routine a habit. With consistent practice your night rides feel more predictable, and your overall safety improves.