This short guide shows what “restore motorcycle plastic and chrome” means in real terms. You will learn how to bring back color, clarity, and shine while protecting surfaces so they last longer. The title and description set clear expectations before you start.
Expect near-showroom results in many cases, but a keen eye may spot repairs on older parts. Work in stages: remove oxidation, refine the surface, then finish with polish and protection.
On the chrome side, clean first, polish next, then add a seal to reduce future upkeep. These workflows save money when parts are scarce and can beat the cost of buying new panels.
Follow the article layout: diagnose the damage, gather the right tools, then use step-by-step instructions for plastics and for chrome. Consistent results come from clean surfaces, grit progression, and controlled buffing.
Why Your Motorcycle Plastics and Chrome Fade Over Time
Sun exposure and road grime slowly sap color and shine from body panels and plated parts. UV rays break down the top layer of many polymers, causing chalking, fogging, and a noticeable color shift. That wear makes panels look tired long before mechanical issues appear.

- UV causes plastics to lose oils and haze; this accelerates cracking on painted areas if left unchecked.
- Road dirt, grease mist, and embedded grit speed dulling and block polishing compounds from bonding evenly.
- Oxidation shows differently by material: polymers chalk and haze, while plated metal can pit, haze, or trap contamination.
Restore vs replace: practical trade-offs
Fixing parts usually costs less but takes more time. Buying replacements is faster but can be pricey or impossible for older bikes.
When to replace for safety
If a load-bearing or structural fiberglass piece is cracked, warped, or compromised, choose replacement for rider safety. For non-structural panels, a proper process can return a very presentable finish, though it may not match factory-new exactly.
Assess the Surface: What Kind of Damage Are You Dealing With?
Start by scanning each panel to spot surface issues that affect finish and longevity. Work in good light and feel the area with a clean finger to find texture changes that photos can miss.

Spotting wear on plastics
Look for chalky oxidation (a powdery white layer), fogging that appears cloudy, and yellowing from sun exposure. Tiny micro-cracks show UV stress; condition the part and recheck to confirm true damage.
Scratch depth: light vs deep
Run your fingernail across any scratch. If it catches, treat it as a deeper defect needing aggressive correction. Light scratches often respond to a mild compound or light buffing.
Quick chrome checklist
- Haze or dull patches that polish may remove
- Embedded dirt debris stuck to plating
- Early pitting or rust staining that signals deeper damage
Map damaged areas so you keep sheen and color consistent across adjoining surfaces. Set a stop point: deep pits or advanced cracking mean you should plan for replacement or professional refinishing.
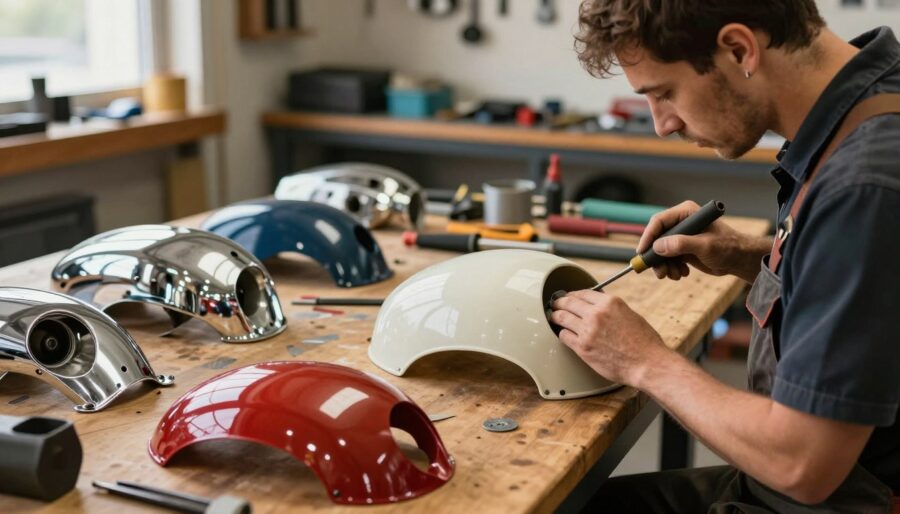
Tools and Products You’ll Need for a Clean, Consistent Finish
Gather the right kit before you touch a faded panel—good tools speed consistent results.
Start with a simple cleaning mix: 3 teaspoons concentrated liquid laundry detergent in about 16 oz of hot water. Wipe with 100% cotton terry cloth and let parts dry for a grease-free surface.
Cleaning supplies
- Detergent + hot water (mix above)
- 100% cotton terry cloth for wiping
- Soft brushes for crevices
Prep and masking
Use painter’s masking tape to create a 2-inch border around damaged areas. Keep an organized area clean setup so adjacent surfaces stay protected.
Abrasives and cutting tools
Keep a razor blade, varied sandpaper grades, and a sanding block. These tools let you plan grit progression and avoid finger grooves on flat panels.
Polishing, buffing and protection
Use a clean buffing wheel with a plastic polish and the correct buffing compound. Separate products for plastics versus plated parts to avoid cross-contamination.
Follow manufacturer instructions regarding each product — dry time, application method, and compatibility vary. For conditioners, apply in a circular motion and check the label for any special manufacturer instructions regarding use to lock in a lasting finish.
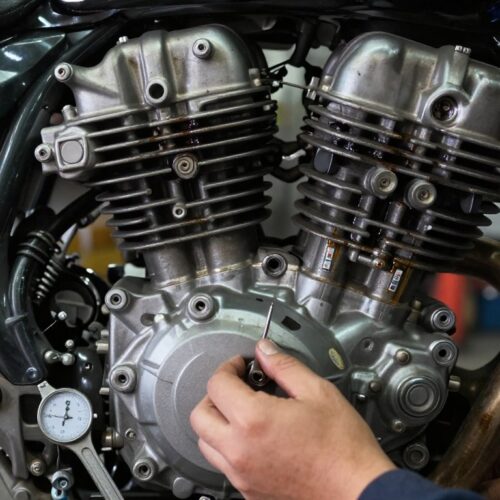
How to Restore Motorcycle Plastic and Chrome Without Damaging the Parts
Before you touch a panel, set a clear sequence so each step helps the next. A do-no-harm roadmap keeps you from overworking a spot and wasting time. Follow order, not force.
Prep step: wash thoroughly to remove grease, dirt and debris
Begin by washing parts to get a grease-free surface. Engine oil and road grime will stop cutting compounds from working and can grind dirt into the surface while you work.
Plastic restoration overview
For faded panels, remove oxidation first, then refine with controlled abrasion. It may look worse during sanding — that’s normal. Remove only thin layers until the new material appears.
Finish with careful buffing using low heat and steady motion to bring back shine. Patience and even technique prevent overcutting.
Chrome restoration overview
On plated metal, start with cleaning to expose the true condition. Polish to restore reflectivity, then add protection to slow future haze and contamination.
- Keep pressure light during buffing.
- Avoid aggressive compounds on lightly damaged areas.
- Repeat small controlled steps for best results.
Step-by-Step: Restoring Faded Motorcycle Plastics
A careful, stepwise approach keeps material removal minimal and preserves original contours. Inspect the part under good light to map where oxidation is worst and where scratches show. Work one section at a time so you control the surface and the time spent.
Remove heavy oxidation by holding a razor blade perpendicular to the surface and gently scraping the chalk away. Aim to lift only the degraded layer without gouging the healthy material.
- Wet sanding: soak sheets in water, keep the panel wet, and follow grit progression (400, 600, 800, 1000). Use 220-grit only for very rough parts to save time.
- Use a sanding block on flatter plastics to avoid finger marks; keep pressure even and check that scratch patterns are uniform before moving up grits.
- Buffing: use a clean buffing wheel and keep it moving to prevent overheating. For the heat-stage shine, you usually do not need compound.
For scratches, pick the right buffing compound: deep-scratch compound for pronounced defects, light-scratch for swirls and micro-cracks. Apply plastic conditioner in a circular motion, then rub polish for a uniform finish. Wipe down with a clean cloth and re-inspect color and shine.
Step-by-Step: Cleaning, Polishing, and Protecting Motorcycle Chrome
Clean metal shows the truth: a dull finish is often just surface contamination waiting to be removed.
Initial cleaning
Start by washing to remove oil, road film, and dirt debris. Use mild soap, warm water, and a soft cloth so you don’t grind grit into the plating.
Tip: Check crevices with a soft brush so grime does not remain under trim or around bolts.
Polishing technique
Apply a small amount of chrome polish to a clean cloth and work one small area at a time.
Use circular motion and finish with steady buffing strokes to lift residue. Repeat until haze clears, but stop when reflectivity returns.
Protecting and maintenance
After polishing, add a thin protective layer to repel water spots and road film. Wipe with a microfiber cloth for the final shine.
- Treat chrome as easier to care for than aluminum or painted surfaces.
- Polishing clears contamination; deep pitting may remain visible.
- Maintain with light cleaning and occasional polish for long-lasting finish.
Conclusion
A little time with the right technique turns tired panels into parts that look well cared-for.
Follow a simple repeatable method: diagnose the surface, clean thoroughly, use the right tools, then work each step for plastics and chrome with steady, patient motion.
Replace any structural or heavily damaged fiberglass pieces for safety. For non-structural areas, UV protection lengthens life while light ongoing maintenance keeps the shine longer.
Expect improved finish without paying for full replacement. Quick wipe-downs with a soft cloth, periodic polish, and modest buffing prevent grime from building and reduce future time spent.
Invest a bit of effort now and your bike will look cared-for without a major teardown or costly parts swap.